You are here
How to Make a Wire & Button Letter
I was teaching a button pendant class at a wonderful local shop called All My Favorite Things over the weekend. And in chatting with the shop's owner, Melanie, I stumbled onto this fun little idea.
You've likely seen this style of button necklace. Well, this project replicates that kind of stringing, only with wire.
Wanna play? Get yourself a pile of small buttons (say, 3/8" or smaller) and some 24 gauge craft wire. It helps to have some wire cutters and needle-nose pliers handy, too.
Getting Started
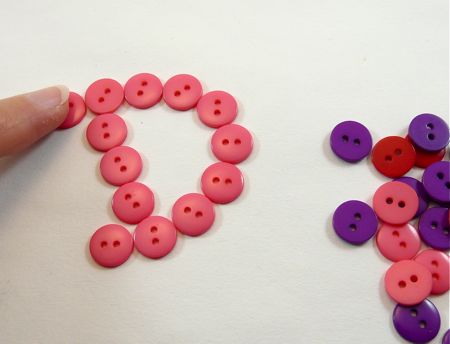
I like to begin by laying my letter out in buttons first. This helps me decide on the size and shape, and figure out whether I have enough buttons. (Incidentally, I like two-hole buttons for this project, but four-holes would also work.)
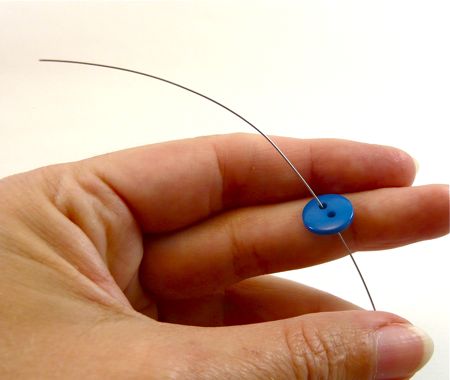
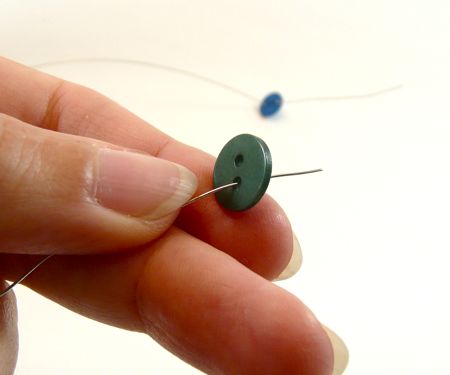
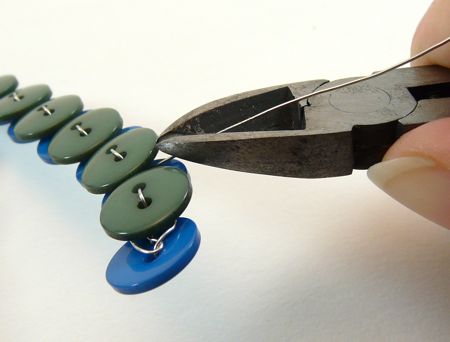
Then, cut about 18" of wire. Bring one end of it up through the back of your first button, leaving a 4" - 5" tail.
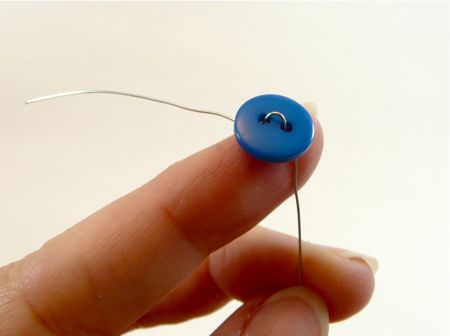
Stitch the other end of the wire - the longer end - down through the other hole in the button, and pull it snug, like this.
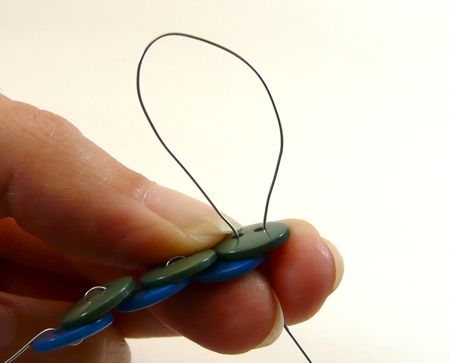
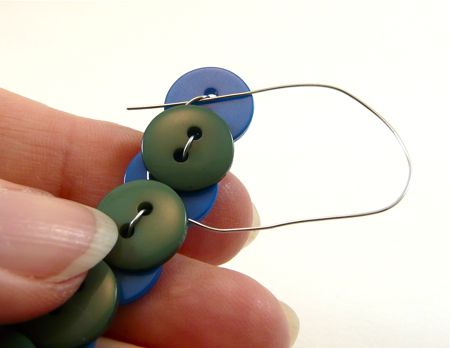
From here, you'll be working with the longer end of the wire. Pass it through the back side of the next button (either hole).
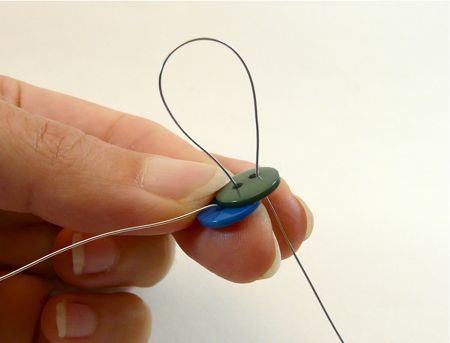
Slide this new button along the wire until it rests against the back of the first button. Then, stitch the wire back down through the other hole again, and pull the wire snug.
Repeat this process to add more buttons. (Of course, you can use buttons that are all the same color if you like - I like the contrast of two colors.)
Careful of kinks!
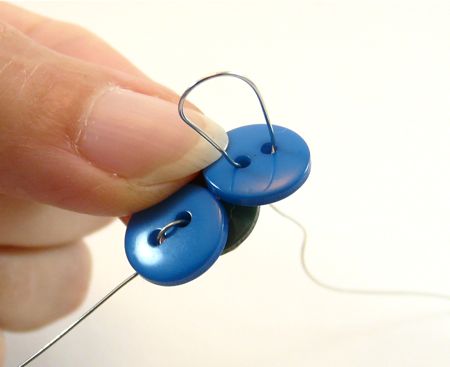
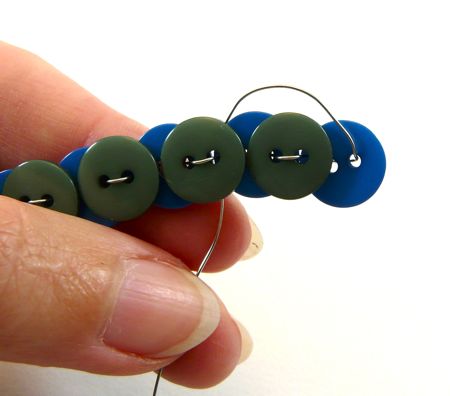
...But I would like to give you a little wire tip: as you're pulling these wire stitches through, this thin wire will often try to twist itself, like this.
Be careful of these twists! They can cause your wire to form kinks, and kinks will cause the wire to break.
So, any time you see the wire twisting, stop and gently un-twist it. In fact, as you're pulling these wire stitches through, you'll probably fall into a pattern of pull, untwist, pull, untwist, pull. It becomes very easy after the first few buttons.
Finishing
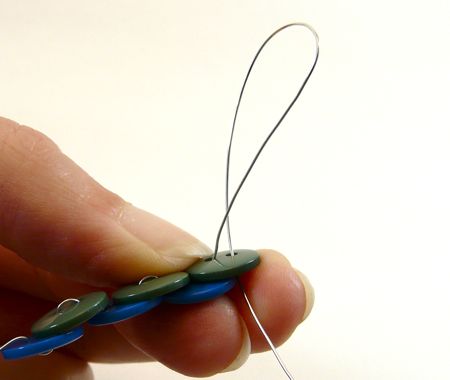
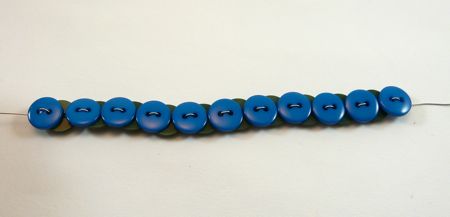
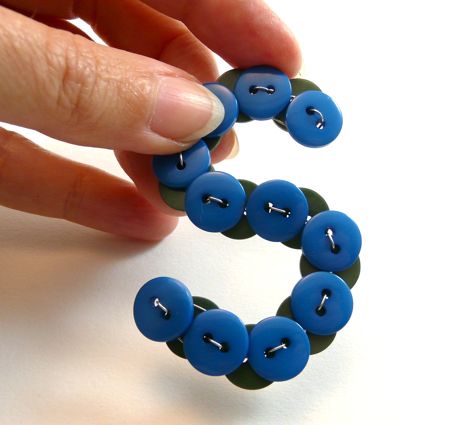
Soon, you'll have a strand of buttons as long as you need.
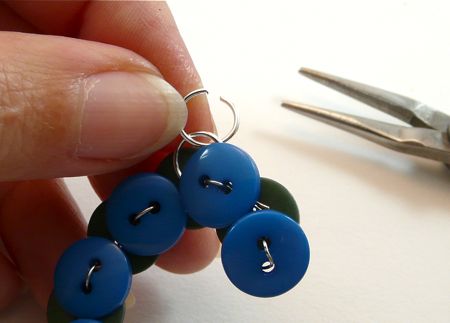
Here's an important note: if your letter will be made of one open strand, like an "S" or a "C," then your button strand should begin and end with top-facing buttons, like the blue ones in this photo.
But if your letter involves connecting the ends of the strand, like an "O," then you'll need one end to be top-facing and the other end to be bottom-facing, so they can be wired together.
If that's confusing, jump to the "Letter Assembly" section below.
Now we need to secure the ends of the wire. Take the excess wire at one end of your button strand, and work it into the space between the two rows of buttons. (You can always bend the buttons around a little if you need to.)
Pull the wire taut so you can't see it anymore - and pliers really help with this. Then, feed the end of the wire back between the rows of buttons and through some of the wiring between them as well.
There's no exact science here - you just need to wind the loose end of the wire firmly between the buttons a couple times. You want to get it a little entangled in the wiring you've already done while stringing the buttons. And most importantly, you want to pull it tight enough that it disappears between the buttons.
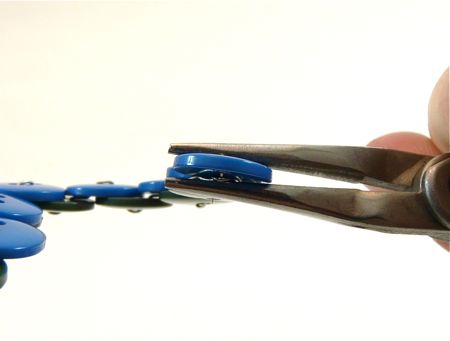
When you're done with that, cut the end of the wire close to the buttons. Use the pliers to bend the tiny cut end out of sight.
Repeat this process to finish off the other end.
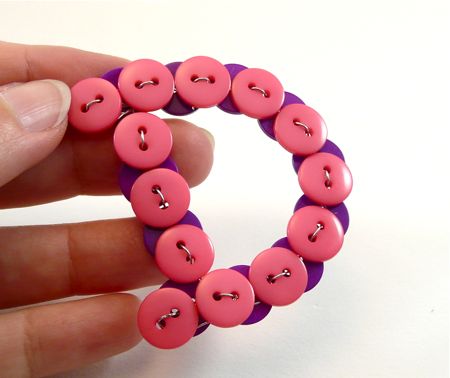
Then you can bend your strand into a letter shape!
Incidentally, if the buttons at the ends of the strand are a little floppy, you can fix that by giving them a little mash across the wire-stitch with your pliers.
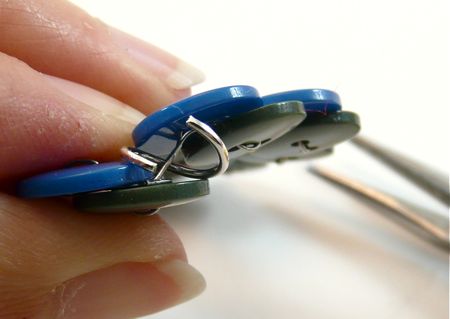
If you want to turn your monogram into jewelry, you can use two large (8-10mm) jump rings. Wiggle one into place around the internal wiring of your strand, and then close it.
...Then add a second ring to accommodate a chain or cord.
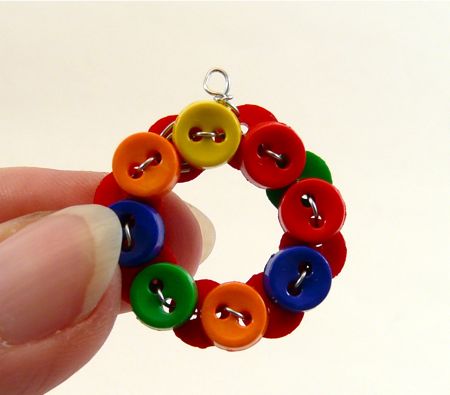
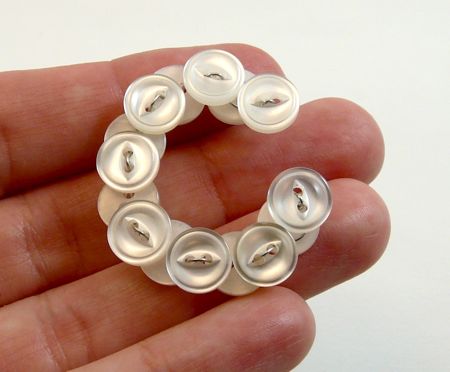
Or, you can do like I did here - these doll buttons were way too tiny to manouver a jump ring into. So, after wiring the ends of the strand together in an "O," I just made a tiny wrapped loop from one end of the excess wire.
(Incidentally, these tiny buttons are awesome looking, but rather fiddly. I'd recommend making your first monogram from larger buttons.)
Letter Assembly
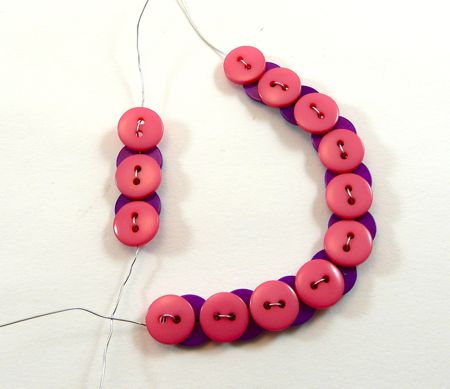
If you're making a letter that has two pieces, like this "D," you can string them up separately.
As you string, you'll want to pay attention to how the buttons will fit together. For example: here, I know I'll need those pink buttons at the ends of the back of my "D" to tuck into place over the purple buttons in the curve.
Here and there, you may find that you have to remove a button from the end of a strand so the pieces will fit together.
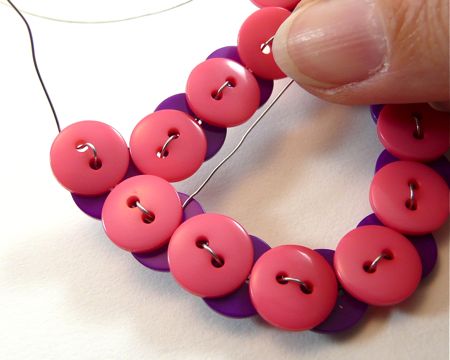
...See how they fit here? And then you can wrap the excess wire at the ends around between the buttons, like we did earlier when we finished the blue strand.
What will you make?
I think these little guys have lots of possibilities! In addition to pendants, they'd be really cute as a dangle on a handbag. Or, as a package tie-on. Or, imagine a curtain for a child's room, with a fringe of button letters.
(Okay, okay, that last one might be crazy-talk. But it would be really cool.) If you make some of these, I'd love to see what you do with them!

![[Valid RSS]](../../../sites/files_cp7/valid-rss.png "Validate my RSS feed")
Comments
These are just fabulous! I agree, lots of potential. I can picture these as napkin rings. But instead of bending them into a letter, I might try bending them into a napkin ring shape. Does that make sense?
Anyhow, great idea, you never disappoint.
What a clever idea and great tutorial! I could see the "O" as a wreath on a card or a picture frame for a scrapbook layout.
Aww, I love it! I like to make monogram ornaments to label my gifts and this is PERFECT! Thanks so much! I'll be linking to this.
SO cute!!! I love them.
Wowww it's beautiful!
Ooh! I want to try this!
Great job on the tutorial, Diane. You know I am not big on buttons - but this idea using wire has me thinking about it! Everything you made for this post is so pretty.
These are GREAT. A good tutorial! Thanks.
I think these would be great as initials on a placesetting. They could be slipstitched onto a fabric placemat.
Cathie says HI!
how cute!
I love the rainbow-ed doll buttons. perfect as a pendant! :D
Hi,
I love the "o"...it could be used in so many ways...
Fill it in with a larger button and use as a...button. ;p
A miniature wreath if done in proper colours.
A brooch, as said above.
Etc...
Nice post.
Andrea
I am thinking it would be cool to do the numbers for my house in white buttons. am i crazy?
xo jackandbee
This tutorial is so brilliant! I can't wait to sort out some buttons and try this. Thank you... my wishes for your happy creations...xoxox TJ in Germany
Those are so awesome!!! I'm trying to figure out a way to use those in my life...
Another lovely idea, Diane. I was just wondering what to do with all the buttons I've collected... My daughter and her friends will love them for their school bags!
Amei!!!!!!! Love!!!!!!!!!
Cool!
Lovely idea
very good, molto belli
Lovely idea
Fantastic idea - thank you for sharing it with us :)
These are GREAT. A good tutorial! Thanks.
Great job on the tutorial, Diane. You know I am not big on buttons - but this idea using wire has me thinking about it! Everything you made for this post is so pretty.
I think these would be great as initials on a placesetting. They could be slipstitched onto a fabric placemat.
Cathie says HI!
Cool!
how cute!
I love the rainbow-ed doll buttons. perfect as a pendant! :D
Hi,
I love the "o"...it could be used in so many ways...
Fill it in with a larger button and use as a...button. ;p
A miniature wreath if done in proper colours.
A brooch, as said above.
Etc...
Nice post.
Andrea
Aww, I love it! I like to make monogram ornaments to label my gifts and this is PERFECT! Thanks so much! I'll be linking to this.
I am thinking it would be cool to do the numbers for my house in white buttons. am i crazy?
xo jackandbee
These are just fabulous! I agree, lots of potential. I can picture these as napkin rings. But instead of bending them into a letter, I might try bending them into a napkin ring shape. Does that make sense?
Anyhow, great idea, you never disappoint.
This tutorial is so brilliant! I can't wait to sort out some buttons and try this. Thank you... my wishes for your happy creations...xoxox TJ in Germany
Those are so awesome!!! I'm trying to figure out a way to use those in my life...
Another lovely idea, Diane. I was just wondering what to do with all the buttons I've collected... My daughter and her friends will love them for their school bags!
Wowww it's beautiful!
SO cute!!! I love them.
Amei!!!!!!! Love!!!!!!!!!
Ooh! I want to try this!
What a clever idea and great tutorial! I could see the "O" as a wreath on a card or a picture frame for a scrapbook layout.