You are here
How to Turn a Cardboard Box Into a Splendid Notepad
I kid you not: I first made this project, from start to finish, in a dream. (Which was pretty great - I mean, it's so hard to find crafting-time during my waking hours. Wish I could manage to craft in my sleep more often.)
Anyway. I like these simple notepads - they're a fun way to re-purpose cardboard into something useful.
In my dream, I used a Kleenex box, so I'll start with one here, too. But you can really use any chipboard box with interesting graphics.
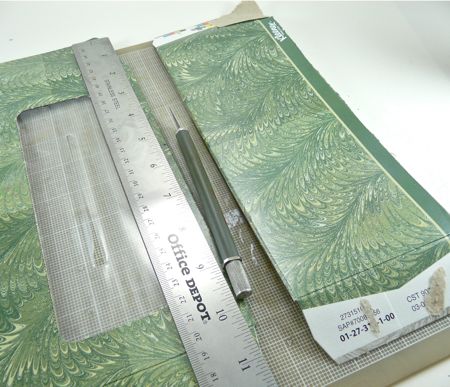
So, cut your box apart into panels. You an really make these notepads in any shape and size your particular box will accommodate. Since this Kleenex box has that big plastic window in the top, I'm opting to use the side here, which will yield a long, narrow notepad.
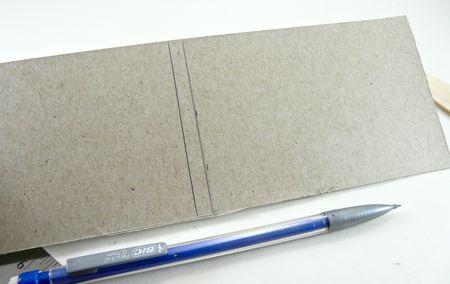
Turn the chipboard over to the back. Get a ruler and a pencil, and draw two parallel lines, about 3/8" apart, in the center.
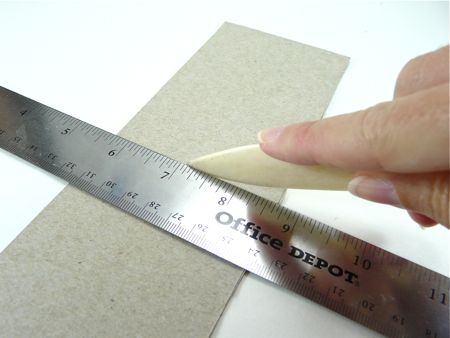
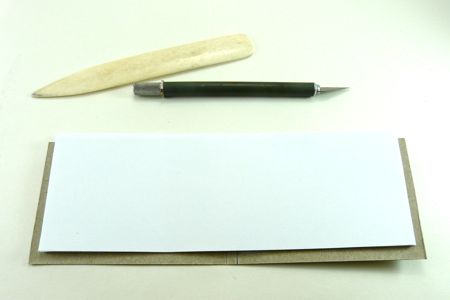
...Then, score these lines with a bone folder. (Jolly useful, those bone-folders.)
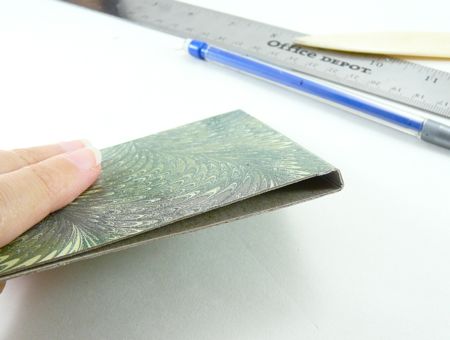
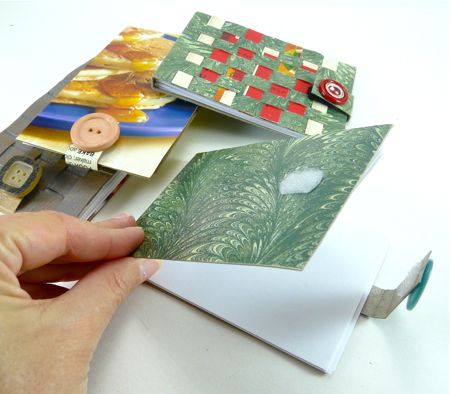
Fold the chipboard along those score lines, and now you have a cover for your notepad. So far, so good!
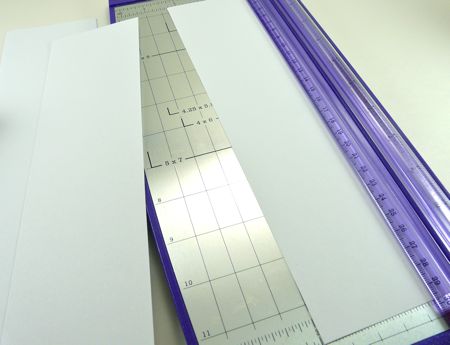
Now, you'll need to cut some paper for inside pages. You can use fresh sheets, or sheets from your recycle bin, or magazine pages, or any other interesting paper you like. You'll need to cut a series of long strips, measuring about 1/8" smaller on all sides than your cover piece.
So, by way of example, my cover piece measures 3" wide and 8 1/2" long. I cut my paper strips about 2 3/4" wide and 8 1/4" long. But if you hate measuring, don't! Just make the paper a little smaller than the chipboard, and all will be well.
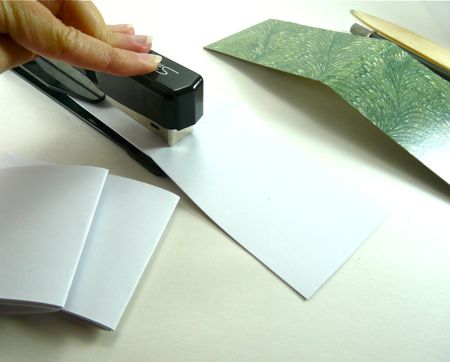
Separate the paper into equal bundles. I cut up five sheets of paper here, so I have three bundles of five pieces each. (But you can totally vary this to suit your fancy.)
Fold each bundle in half crosswise. Unfold it, and staple it once along that fold line.
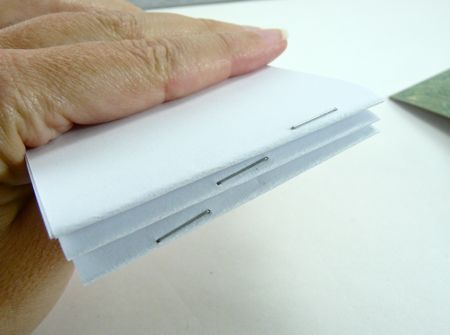
Ooh! A Lazy Bookbinder's Trick: place the staple in a different spot on each bundle. That way, you can pack the bundles together more tightly when you bind them into the cover.
(This might be a good time to add: you could also make these notepads with fancier stitched bookbinding methods, like this or this.)
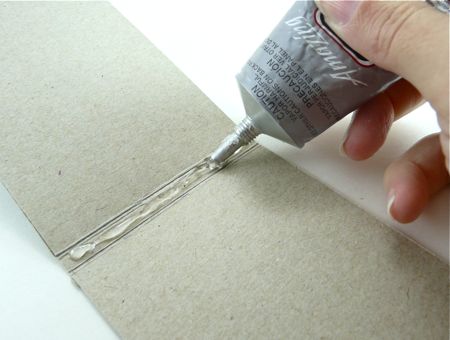
Now, take your cover, and apply some strong, flexible glue, like E6000 or Amazing Goop, inside the spine.
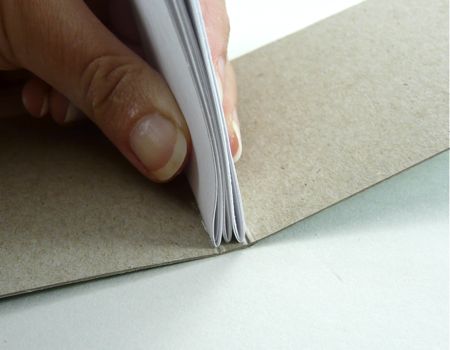
Press those paper bundles together, and set them into the glue.
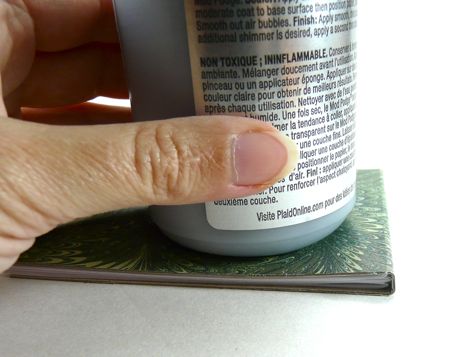
Fold the cover closed, making sure all those bundles are pressed firmly into that spine-glue. Then, place a weight on the pad and leave it to dry for several hours or overnight.
(Yup, Amy, that is what you think it is.) :-)
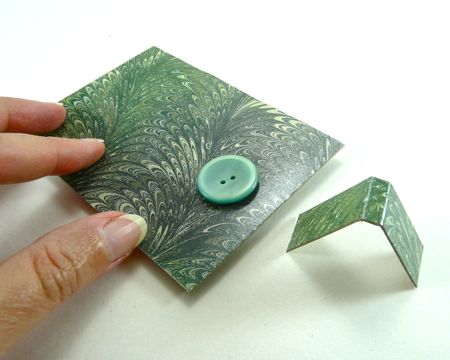
When the binding is dry, then you'll need a little strip of chipboard. Mine measures about 3/4" x 3" Score this piece twice in the center, like you did the cover. The scores should be about 3/8" apart, same as your cover.
You'll also need a nice big button - 1" or larger.
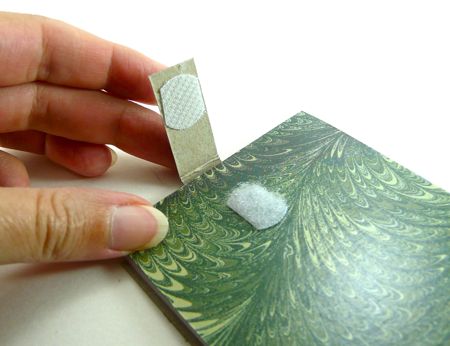
Glue one side of the strip to the back of the cover - Tacky Glue is fine for this.
Then, stick some velcro to the strip and the cover, as shown here. I'm using those self-adhesive velcro dots, and I trimmed them down a little to fit. You can also use regular velcro, and glue it down.
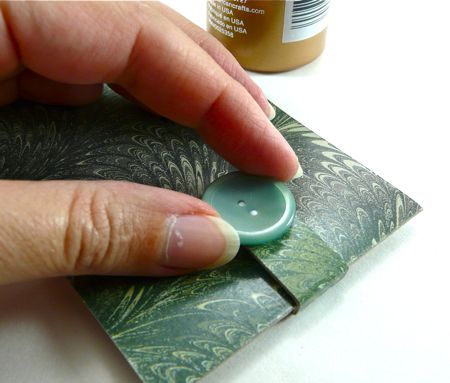
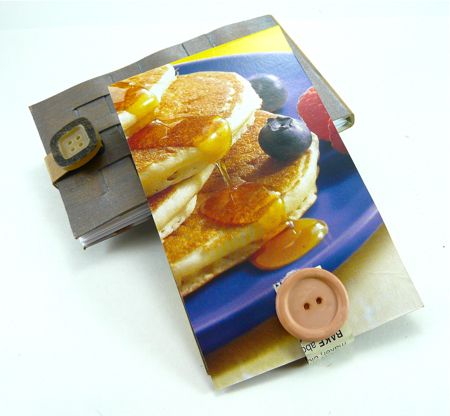
Lastly, glue your button in place on top of that closure strip. Let everything dry completely before you try opening the cover.
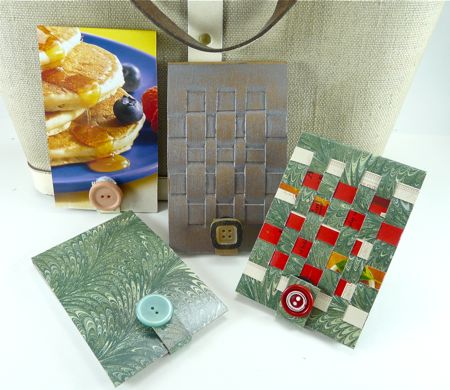
These are easy to make, and addictive! There are a million creative possibilities here - you can use old album covers, or food boxes, or toy packaging, and on and on. The world is filled with interesting cardboard, my friends.
...I should say, too, that in my dream, I was able to open and close this notepad with my mind. Sadly, I have not been able to figure out how to make this part of the project work.

![[Valid RSS]](../../../sites/files_cp7/valid-rss.png "Validate my RSS feed")
Comments
Thank YOU! What a great use for a handmade notebook! My Mom would
totally approve. :-)
I've shopped until I was grumpy looking for a notebook to serve as Christmas Central, the notebook I make Christmas plans in and where I keep track of presents as I find them, make them, buy them, and wrap them up. It's also the place I write out menus and recipes for the most important meals I want to make.
I bought three notebooks! Three and not one of them suits me as much as one I could make myself.
Thank you, Sister Diane. I am going to make the fourth book of the bunch, and this is the one I will use.
Ha ha ha! I have totally crafted in dreams and then recreated the results in real life. I did this apple spider last year - from a dream: http://croqzine.com/blog/?p=244
Great! And I know just the kleenex box to use! :)
Hee hee... I was TOTALLY thinking about your Kleenex boxes as I made
these! I fully intend to score some and make notepads when they're
empty.
You are brilliant, even in your sleep! =) Can't wait to whip-up a few of these little cuties!
Thank you! Hope you have fun with them!
You DREAMT this??! Your powers will never cease to amaze me. I'm off to hunt for some attractive cardboard - all I have in the recycling bin at first glance is a cat food box, which comes with the added bonus of cat biscuit fragrance :)
Heh - your cats will love keeping their notes on it, too! :-)
I love this idea-I may be able to use it with my students for Christmas presents! We use a lot of tissues...
Maybe you could start another blog called "Crafting one dream at a time." Maybe we could subscribe in our dreams and save a lot of time and eliminate bad dreams. :) Mine was a doozie last night. :(
...Now, THERE's an unexplored form of 21st-century media! :-)
Ha! I'm totally doing this. Hellooooo stocking stuffers! Thanks Diane!
One: This is completely brilliant! Two: I love that it came to you in a dream - like when you start dreaming in a foreign language because you've integrated it so completely! Three: so excited to see you using chipboard from products! I have a stack of Joe's Os boxes (Trader Joe's brand Cheerios) that must be seen to be believed . . .
Wow! Maybe if you pop a blank CD under your pillow each night you could come up with a whole book that way. Looks like something I'll be making! Just love paper...
Hey - that CD thing is totally worth a try... :-)
ohhhhhh soooo cool i was looking for something like this, thank you
Love this idea, need to go take a nap and hope for some good dreams like yours..Esp. love the weaving options. you are great!
Thanks, Kat! (I owe you an email - sorry! Busy week. Will be in touch
soon!)
Oooh! This made me so happy Sister D! Everyone I know is getting these in their Christmas packages and I have many young people at college this year and am always looking for inexpensive little treasures to tuck into care packages for them. Thanks for the (as always) comprehensive and well photographed instructions. BTW, I get my BEST design ideas when I am sleeping. Not sure why, but I often wake up totally inspired and some times obesessed to get the ideas to the studio before they vanish.
So, in all seriousness, Kathleen - are there things we can do to
cultivate this kind of creative dreaming? I wish I dreamed this way
more.
Oh goodness, I have no idea, but will bring up the subject over upcoming dinner tables!
There's no consistency in mine. Sometimes if I eat something bad (read: good ol' comfort food) right before bed it sets off the MOST colorful and elaborate dreams. Other times it's when I'm stressed. And then there are times when I've just put down a really inspiring book like, say, oh I don't know, Kanzashi in Bloom (have you read it? it's fabulous;) and I go to bed with visions of sugarplums dancing in my brain. Occasionally when I have one of those all-too-wonderful toss and turn nights (we call this "fish on a beach" sleep) I may roll in and out of creative and inspiring dreams. I get a lot of good color combinations and eye popping patterns when I close my eyes but am not yet asleep, which I try to duplicate through paint or in a sketch the next day. Never quite as good as in the dream, and no I didn't do LSD when growing up in the 60's tho my college professors told me nothing beats smoking pot to enhance a creative moment...but that's another show.
I am going to explore the idea (dream cultivation, not smoking) and will get back to you with the enlightenment that comes my way!
Happy weekend.
Kath
Kathleen Kibblehouse
www.MakeThisFromThat.blogspot.com
Find me on Facebook and on Twitter as: SweeTart77
First of all, it's pretty awesome that you're crafting in your dreams and the craft is actually doable (except for the mind open/close thing). Second of all, this is the neatest project! I love making things out of empty cardboard boxes. I'd created the most wonderful desk organizer at my last job out of Swiss Miss hot cocoa boxes. It was pretty rad.
And, as always, your tutorial is clear and well-written. :)
Love this! Just wanted you to know that I linked this tutorial on my blog!
Awesome! Thank you so much, Kim!
Awesome! Thank you so much, Kim!
Love this! Just wanted you to know that I linked this tutorial on my blog!
I tired it! It turned out really cool and now I can't get ride of any of my cardboard boxes :)
You can see the results here
http://klaydoughdreams.blogspot.com/2010/03/tut...
That came out so AWESOME!! I love the cereal pictured on the cover - great job!
The button adds such a cute touch! Thanks for sharing the tutorial!
Really love these little books. We are going to make them for a historic letterboxing trail at our Heritage Day here in Purcellville Va. Thanks!
Oh, I love that idea! Happy Letterboxing!
Thank you, Nancy! I appreciate that!
I have to tell you...I stumbled onto your site and had forgotten how much I love to craft. You have inspired me to get back into something I used to love and now love again. Thank you.