You are here
How to Make a Quilted Thanksgiving Card
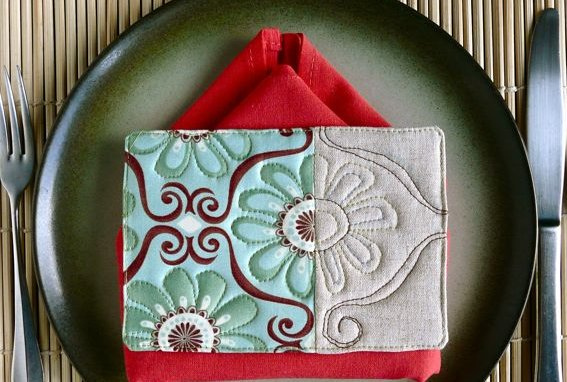
You can make one of these quilted cards for every person at your Thanksgiving table. You can write each of them a personal message (on the back), thanking them for something nice they've done for you. Or, you can make each person several blank cards, and they can send thank-yous to people in their lives.
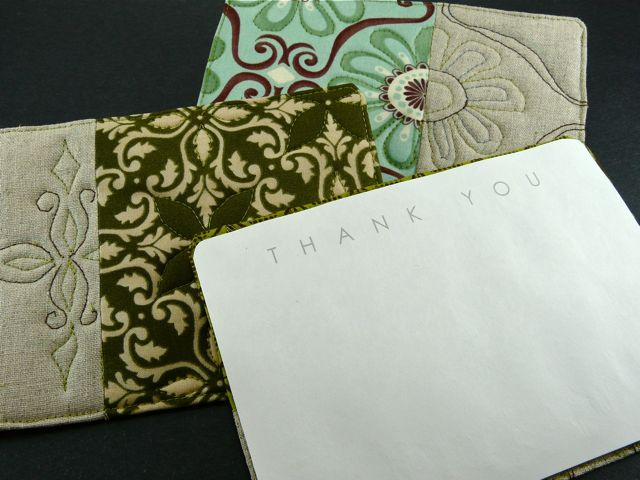
Before we get into how to make 'em, here's another shot that shows the back. I also love this project because it's a great way to play with quilting without having to wrangle a whole quilt!
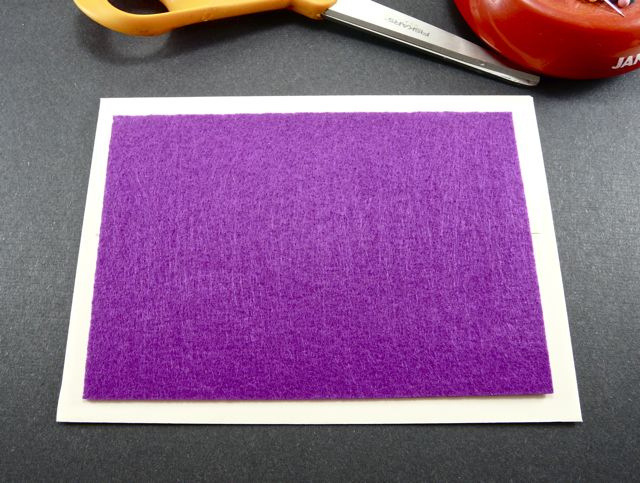
So, the basis of this card is Friendly Felt, which is a stiffened acrylic felt made from recycled fiber. I love it because it's lightweight and just rigid enough, and you can sew through it with ease. I routinely find this in the kids' section of my local Jo-Ann store, and you can also get it online (try a search on Etsy).
If you don't have access to Friendly Felt, you could also use lightweight chipboard, though the sewing may be tougher going.
Anyway. Cut a piece of Friendly Felt to the size you want your card to be. Here, I'm sizing mine to some envelopes I have in stash - 6 1/2" x 4 1/2". (The card will "grow" in thickness, so make sure it's 1/4" smaller on all sides than your envelope. Or, skip the envelope.)
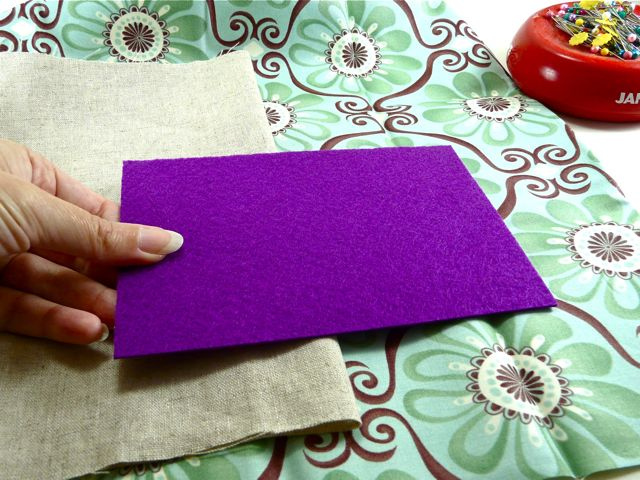
Next, you'll want to play with some fabrics and decide on a patchwork configuration. I did a really simple combination of one print fabric and one linen fabric, but you could do all kinds of different things here.
You'll need to end up with a patchwork piece that's about 1" bigger on all sides than your Friendly Felt piece. While you're here, cut a piece of cotton quilt batting that's the same size as the Friendly Felt.

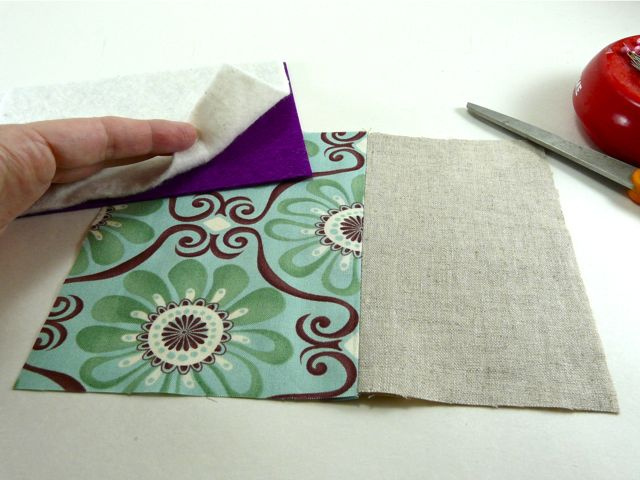
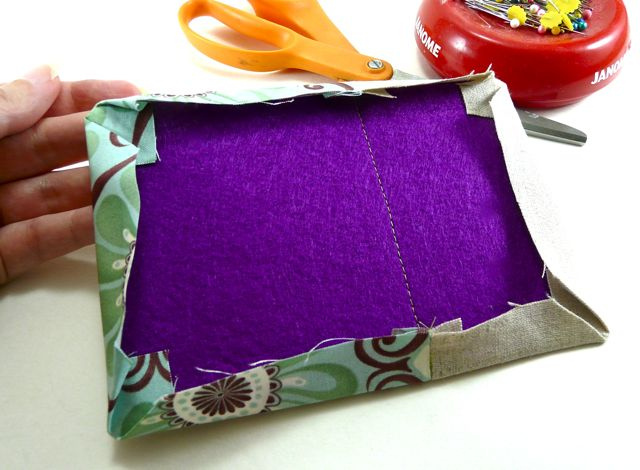
Next, stack everything up in this order: your patchwork, face down, on the bottom; the batting centered over it; and the Friendly Felt centered over the batting.
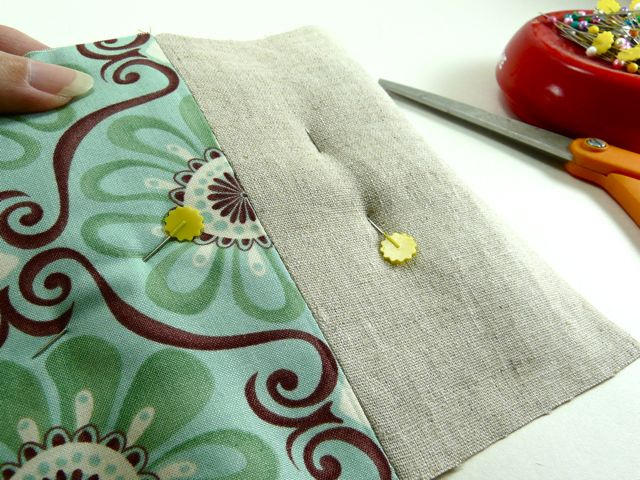
Incidentally, you can pin these layers together - just use long pins and pin shallowly so you don't warp the Friendly Felt. With the design I'm doing here, I like to pin things so I can keep that one seam in my patchwork parallel to the edges of the card.
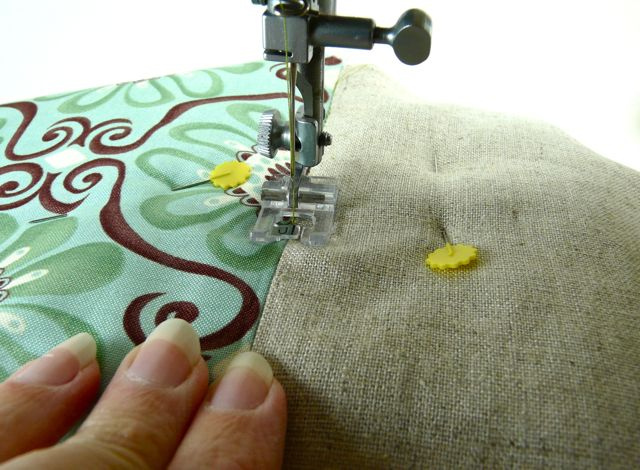
So let's anchor these layers together. Head to your sewing machine and "stitch in the ditch" right along that seam line. (If your patchwork is more complex than mine, you'll probably want to sew along all your seam lines.)
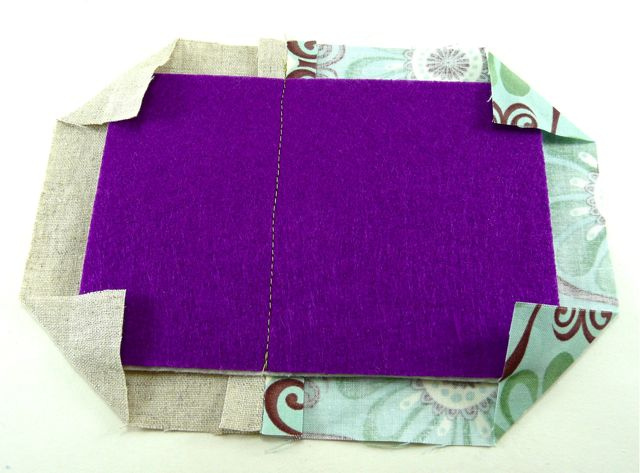
Now, head over to the ironing board and press all four corners to the back, as shown here.
Then, carefully fold all four edges to the back and press them, too.
Pressing Friendly Felt, by the way, is interesting. I recommend that you always keep a layer of fabric between your hot iron and the Friendly Felt. The felt will actually get quite soft when you apply heat, so be careful not to warp it when it's in that state. It'll quickly cool and get rigid again.
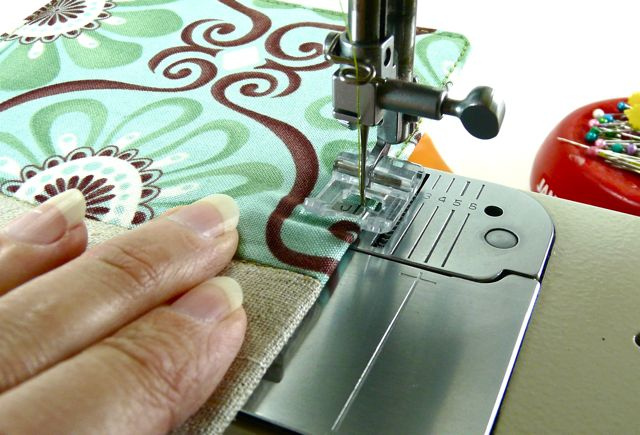
With the edges pressed, go ahead and stitch close to all four edges to anchor them in place.
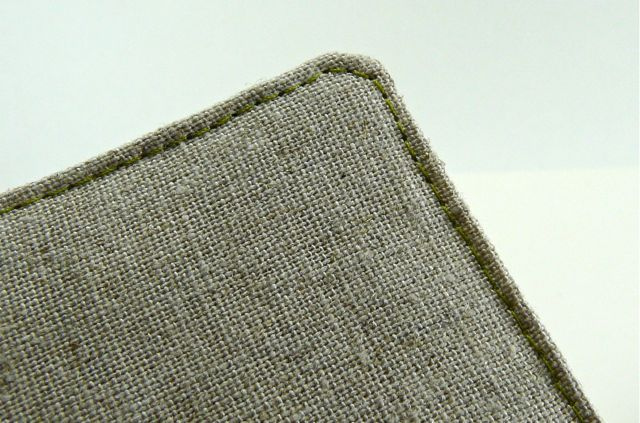
You know, if I were a better quilter, I might have made nice, square corners. But since I'm not, I made rounded corners part of my design and moved on with my wonky-quilter life.
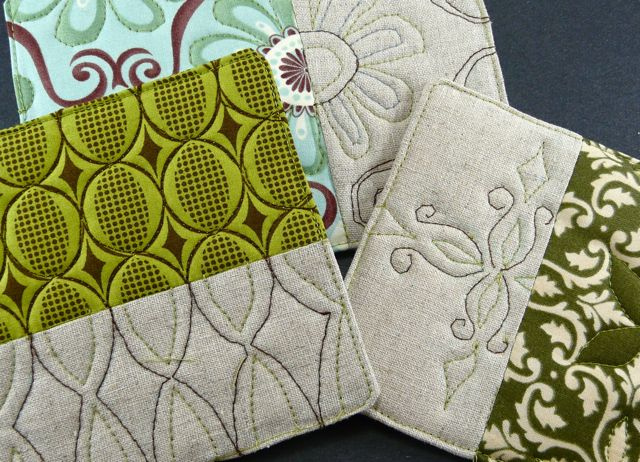
Now, it's time to start quilting. I'll just mention quickly that there are approximately one bazillion ways you could quilt these cards - you could hand quilt, you can machine quilt, you could embroider them, Sashiko, Trapunto and so on. I decided to quilt a design on the linen that mimics the print of the fabric.
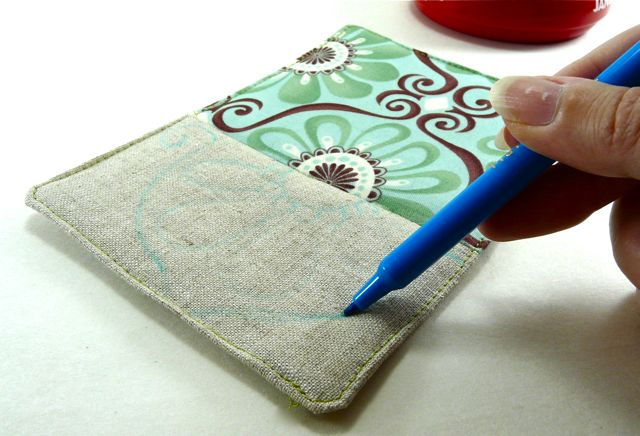
If you like, you can draw your quilting lines onto the card ahead of time with a water-soluble fabric marker. Preferably one that's not on its last legs like this one is.
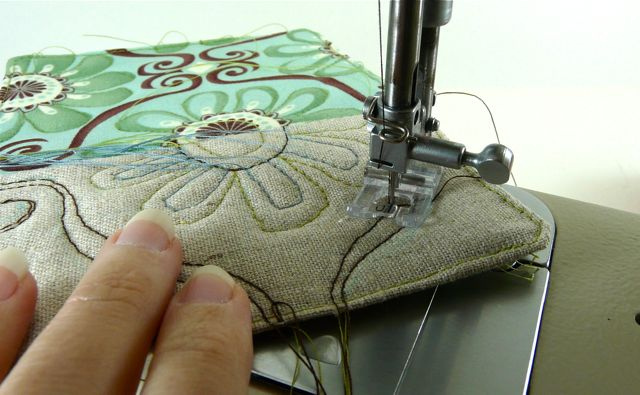
From there, you can pop this back on your sewing machine and quilt away. I like to use two or three colors of thread. For these cards, in addition to the quilted design I did on the linen, I also quilted along parts of the design of the printed fabric.
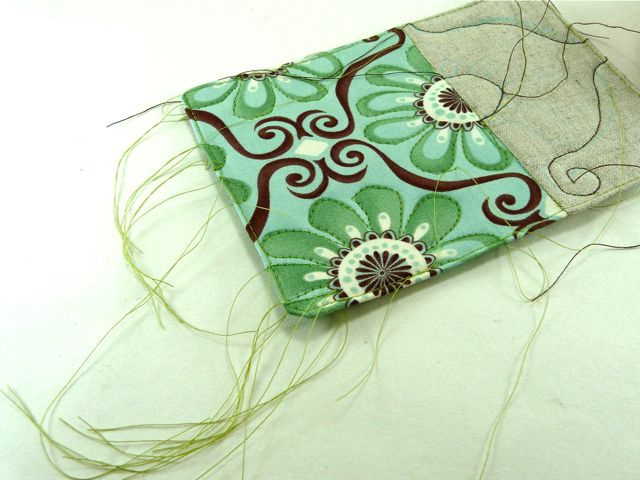
Now, as I do this quilting, I don't start and end my seams by reversing my machine and back-stitching (like you might do in a garment-sewing project). I find that, with so many small seams in a tight space, all that back-stitching looks messy. So instead. I leave thread hanging from the start and end of each seam. Just keep moving the threads out of your way as you work.
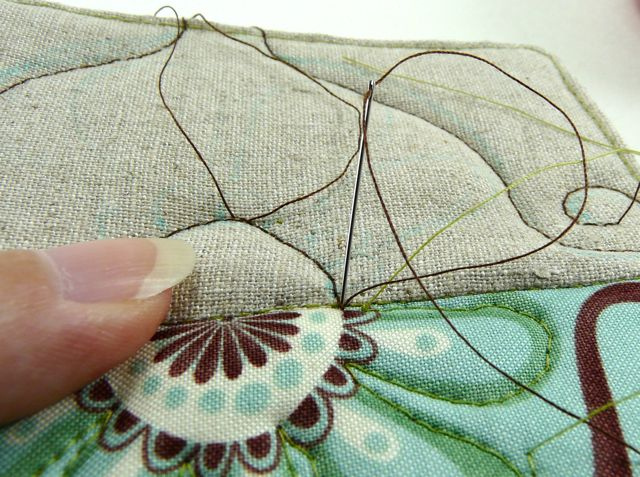
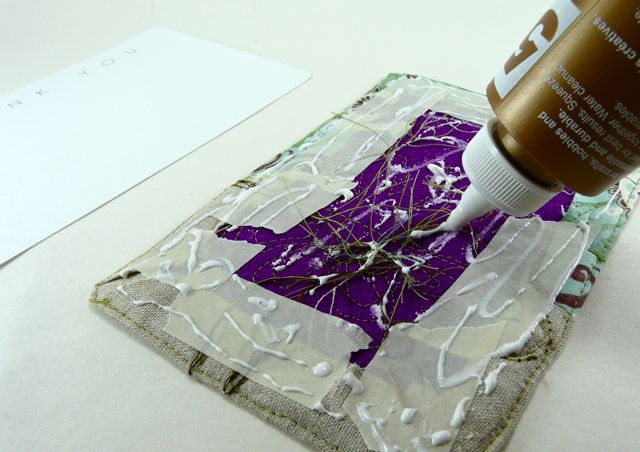
Here's how I deal with all those hanging threads. First, any threads that are hanging from the inside of the card, I thread them one by one on a needle and pull them to the back side. There, I just trim them to about 2" long. I don't bother knotting them, because they'll be glued in a moment.
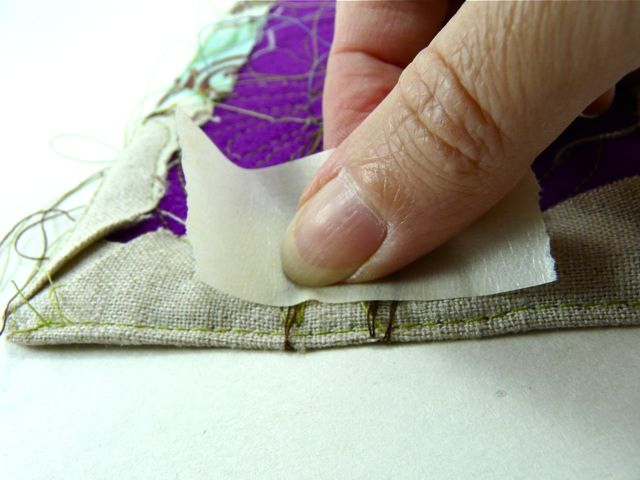
…And here's where I'm going to cause several accomplished quilters to spill their coffee. Wherever my quilting seams run off the edges of the card, I simply gather them, pull them to the back side, and tape them down with masking tape.
I know, right? Tacky! But the thing is, I spent well over an hour on one prototype, pulling all the edge-threads to the back and carefully knotting them. And the result looked exactly the same as this quicker-and-dirtier method did. So, there you go.
(Keep that masking tape at least 1/4" from the edge of the card, by the way.)
Now, cut a piece of card stock to match the size of your nearly-finished card. I made a simple one with my computer's word-processing program, printed it, and cut it out, rounding the corners to match the quilted card.
Then, apply a light coat of tacky glue to the back - and be careful here. Too much glue can cause the card stock to warp and wrinkle.
Apply the card stock to the back of the quilted card…
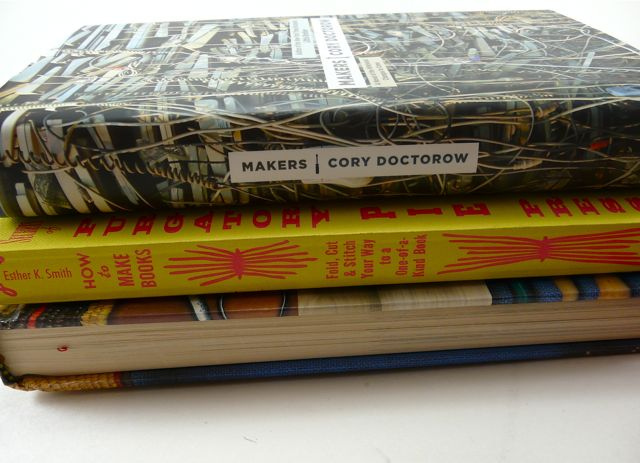
…And quickly place it under a stack of heavy books. (Preferably excellent books like these.)
And that's it! Once I had the process down, I was able to turn one of these babies out within 30 minutes. You could do it in less if you did simpler quilting.
If you make some of these, I'd love to see them in the CraftyPod Reader Projects Flickr Pool!


![[Valid RSS]](../../../sites/files_cp7/valid-rss.png "Validate my RSS feed")
Comments
Oh my gosh! These are beautiful! I love them! I might try this for notes to my children on their birthday. What a keepsake! Oh, or one to my Grandma for Thanksgiving this year...she would sooo love it!
Rebecca@RootsAndWingsCo
PS Thanks for the inspiration!
Thank you so much, Rebecca! I love the birthday idea!
Yay! Make and share 'em with us! :) Like I needed another reason to buy/hoard little snippets of fabric.... ;)
Ohhh... as a non-sewer I can totally appreciate a small quilting idea. The whole taping threads would be along my line of thinking too (hehe!). Will definitely need to try this out.
Thank you, Patricia! These could even be made simpler by using a single print fabric instead of the patchwork, and then just quilting along the design.
GREAT IDEA!
Thank you, Mari! I hear you on the time - I wish I'd managed to get this posted last week. Ah, well - file it away for next Thanksgiving, then!
Well. That is just gorgeous. Love the details and photos in your tutes. Now. If I could just find some time to do something like this...
These are so beautiful!! Perfect timing for me too because I just finished a handful of Christmas presents and ended up with a tooooon of leftover pieces...Now I have some inspiration on what to do with those scraps :) Thanks!!
So gorgeous Diane! Thank you for putting so much time and heart into this tutorial! I especially love your rounded corners and masking tape trick...you are a girl after my own heart.
Thanks, Sarah! Easy-ness gets more crafting done, right? :-)
These are lovely, Diane. I like the intricate prints settled by plain linen and simple lines - very nice!
I was starting to mentally check out when I thought you were going to tell us to knot all those threads. "No way, girl, too much time...Oh, masking tape! Awesome!" Loving that masking tape lurks inside these gorgeous designer cards. :)
Since I have ornaments on the brain, I'm thinking a slightly smaller version for the tree could be cool.
Heh - I almost abandoned the whole tutorial, when I did spend the time to knot the threads on the first prototype. Then I decided to find a much easier way.
Ornaments are a SPLENDID IDEA. Thank you for that! I'm totally going to make some up now!
Yay! Thank you, Jen! I hope you do make some! They're really fun, thanks to the masking tape. :-)
Awesome! I'd love to see how yours come out!
This is an amazingly inspiring tutorial! Love the graphics just as much as the actual project - nice!
Thank you, Stephey! I love shooting step-by-steps!
I love this project! . . but one question. At what point, and how, do you remove the "water soluble" pen lines? 'Seems like getting the whole thing damp could be a problem. Would a chalk quilting marker work?
Oh, shoot - I meant to mention that. Thanks so much for the catch!
I always just moisten a Q-Tip and run that over my lines. Lifts the marks right off without overly wetting anything. You can also use a cotton ball with most of the water squeezed out. Hope that helps!
Just saw these at One Pretty Thing and I love them!! They are gorgeous and what a great tutorial. Thanks!!!
Just saw these at One Pretty Thing and I love them!! They are gorgeous and what a great tutorial. Thanks!!!
You make me wish I could sew so well. Such chic and sleek cards.
This lovely idea is limited only to 365 reasons per year-- a card every day, for every occasion. It's a labor of love. My wheels are already turning...
How did I miss this tutorial when you wrote it?!?! As Kelley said, this is good for many times, not just for Thanksgiving.
Friendly felt - if it gets soft and warps when heated, does that mean it could be heated and shaped on purpose? Like into bowls and boxes?
OMG!!! I've never tried that. but now I totally want to! I suppose it's all about getting it quickly into the proper shape while it's still quite hot. If you try this, I would love to hear about your findings!
Oh - although I should say, I've done boxes using just folds and stitches: http://www.craftypod.com/2011/04/05/how-to-make-a-felty-easter-gift-box-...