You are here
How to Make Japanese-Inspired "Upholstered" Ornaments

I got the inspiration for these ornaments a couple years back, when I saw this post on Zakka Life. I was also inspired by Oshie, an old Japanese craft in which you use small pieces of silk and paper to make padded shapes, which fit together into a particular images. You can see some stunning examples here.
My version is greatly simplified from the traditional craft, but I love the tailored quality these things have! And, due to the whole Kanzashi thing, I have vast stores of tiny fabric scraps. This project is an excellent way to use those up.
So, wanna make one? Here we go. First, you'll need some thick, fairly rigid cardboard. Thick chipboard or mat board work well here. Corrugated isn't a good choice - it can bend too easily.
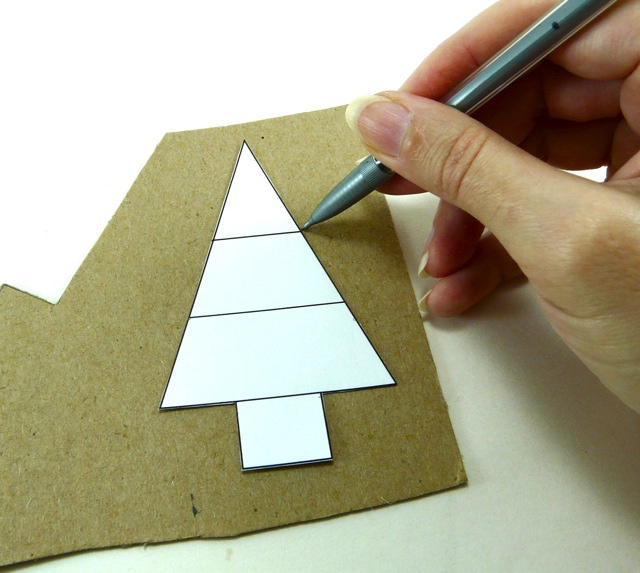
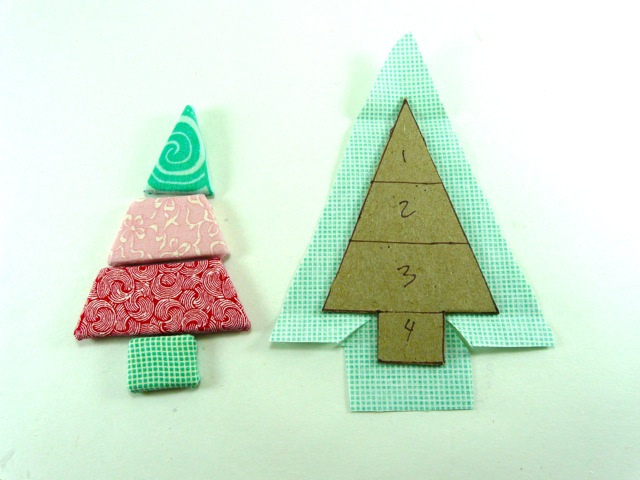
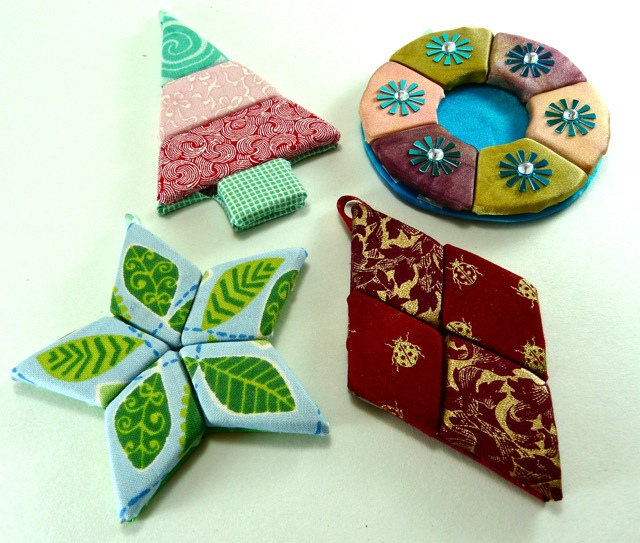
I made you guys a downloadable set of four design templates, so feel free to use those or make up your own design. To get started, trace your shape onto the cardboard two times. See the dividing lines on the shape? Transfer these to the cardboard as well.
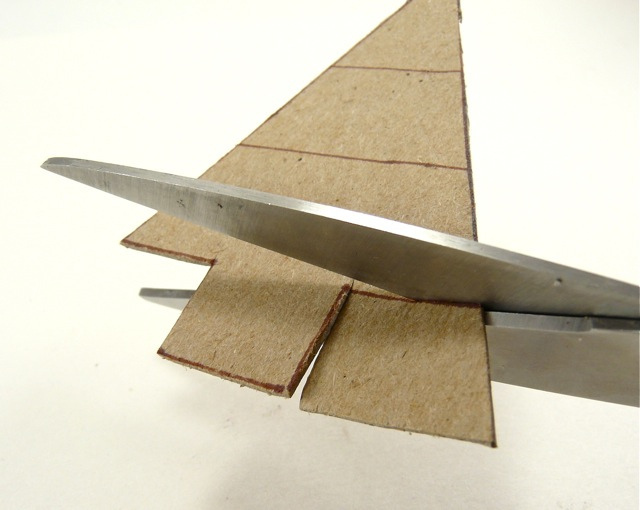
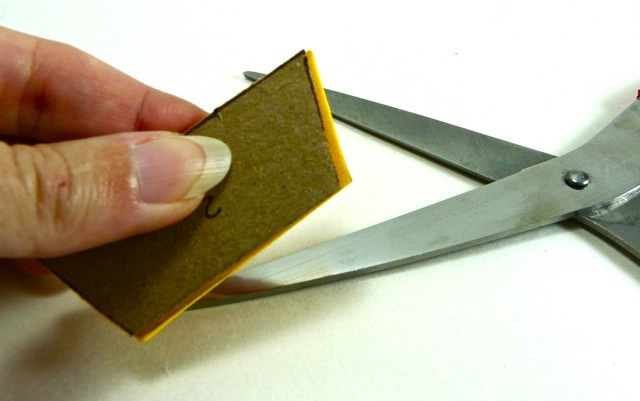
Carefully cut them out, making sure you don't bend the cardboard in the process. The easiest way to prevent bending is to always cut in to corners, not around them.
(If you wanted to be fancier than me, you could also cut your shapes out with a craft knife and ruler.)

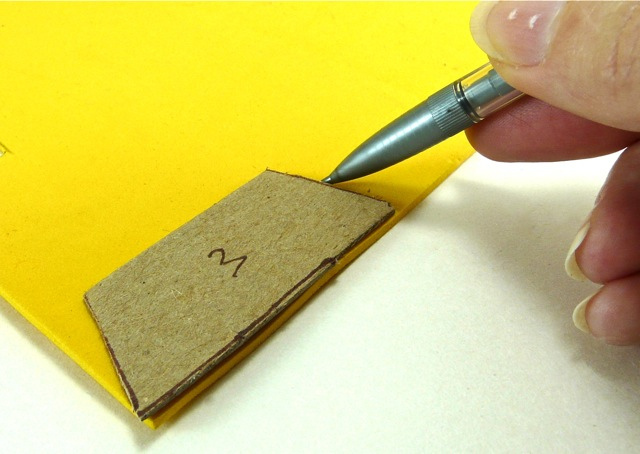
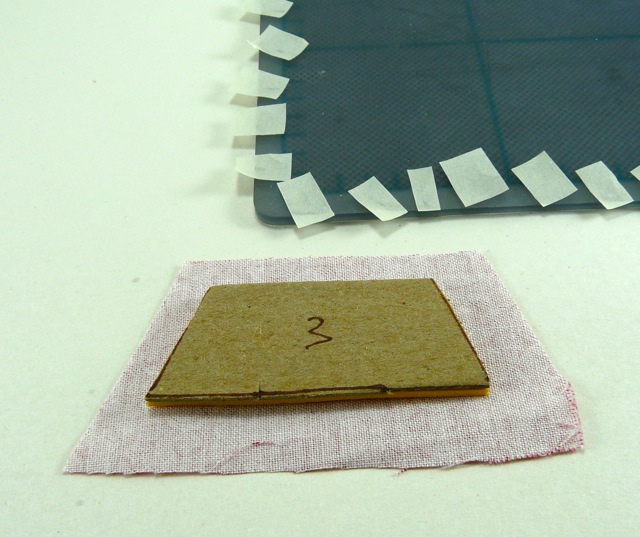
Cut one of the two shapes into sections along those dividing lines. Leave the other intact. And then, number the sections identically on each shape, as you see here. This will help you keep everything in the right order later on.
That may seem like a silly idea with this tree shape - after all, it's pretty clear which part is which. But with a shape where all the pieces are nearly identical, this numbering scheme makes a huge difference.)
OK, now to "upholster" each of these pieces. Start with the cut-apart sections. Trace one onto a sheet of craft foam. (You can get this stuff in the kids' section of most craft stores. One sheet will make a lot of ornaments.)
It's important that the craft foam be exactly the same size as the cardboard. So stack the two together, and if your foam sticks out at the edges anywhere, like it's doing here, trim away the excess.
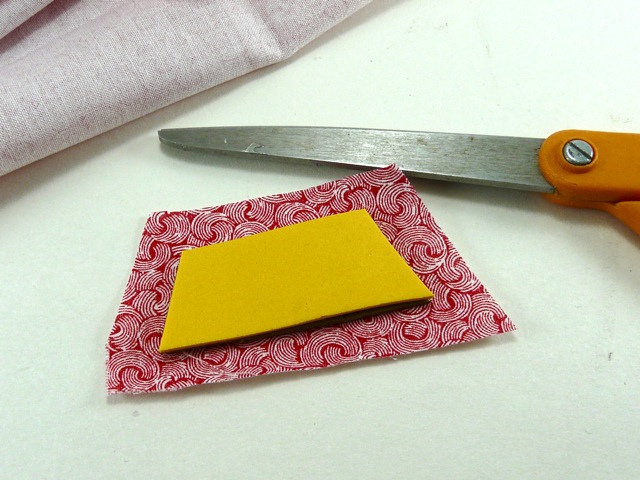
Now it's time for fabric. Cut a piece that's about 1/2" larger on all sides than the cardboard/foam pieces. You don't have to be super-precise about it, as long as there's roughly 1/2" on all sides.
You'll need some masking tape for the next step. (Good old masking tape!) Cut yourself a whole bunch of little pieces, and spread them out where you can grab them easily. I usually take about a 3" strip off my roll, cut it in half lengthwise, and then snip each half into a bunch of smaller tabs. You'll need some larger and some smaller, like you see here.
Also, place your fabric piece face down. Center the craft foam over that, and center the cardboard over the craft foam.
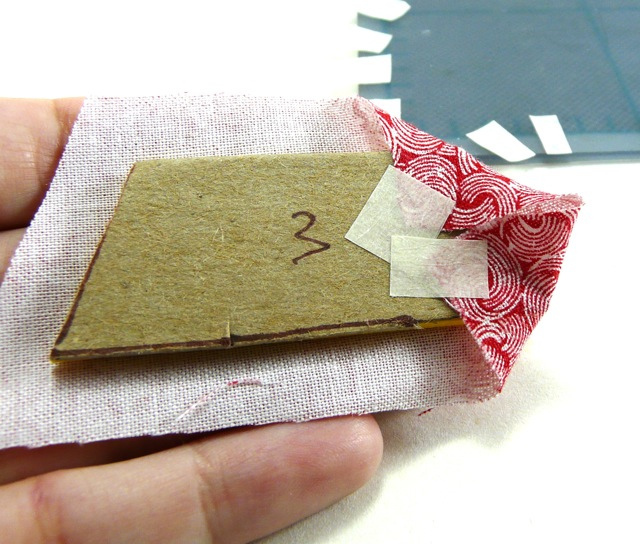
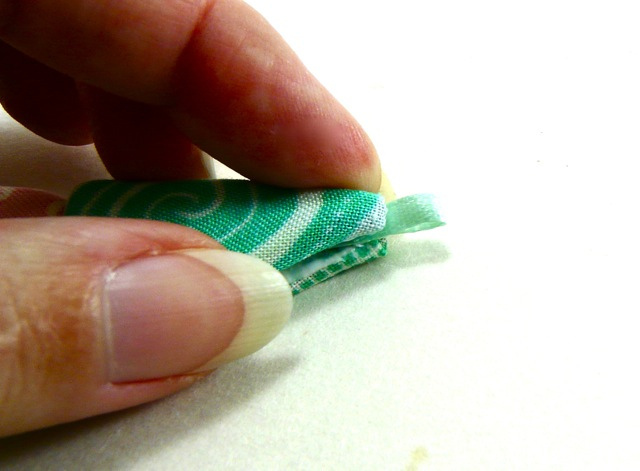
Begin the "upholstery" process at the corners. Gently stretch the fabric over one corner of the cardboard - be careful not to pull the fabric so tight that you bend the cardboard. Tape the fabric to the cardboard with the masking tape, burnishing it down firmly with your fingers.
I like to pull all the corners to the back first and tape them down. That gives you nice, smooth fabric coverage.
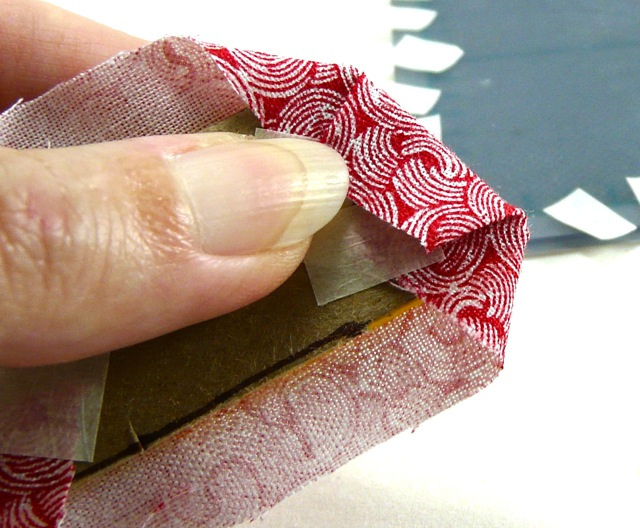
With the corners down, then pull the fabric around the sides of the shape and tape it down wherever needed. Some shapes need a lot of tape, and some don't. Just make sure that you're getting the fabric pulled nice and smooth over the front of the shape.
When you're done, you should have something that looks like this. Be careful not to let the tape wrap up over the sides of the shape - you'll want all the tape hidden.

Just a quick note: some shapes will have sharper corners, like this one. Occasionally, you may need to trim away a little excess fabric in order to tape it down smoothly. And, if you're taping in tight spaces like this, keep plenty of smaller tabs of tape on hand.
Repeat this process to "upholster" the remaining pieces. (I have no idea why I feel so compelled to put that word in quotation marks.) As you work, keep these pieces laid out in their numeric order, so you know which ones go where.
Next, cut another piece of fabric that's 1/2" larger than the intact piece on all sides, as you see here. You'll follow the same process to stretch and tape this fabric around the cardboard. Wherever you have an inward-facing corner, like you see at the tree trunk above, clip into the fabric a little.
(Just to clarify a point: this backing piece doesn't have any foam padding. You're just covering the cardboard with fabric.)
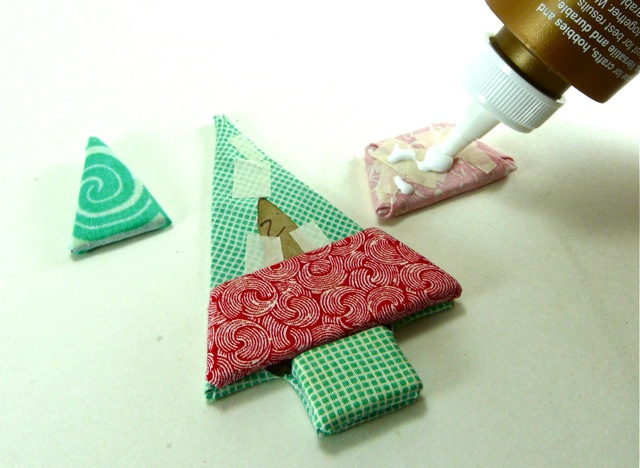
With your fronts and back all covered, it's time to assemble the ornament. Place the back piece with its fabric side down. Then, put some tacky glue on the back of each "upholstered" piece, and then place it on its correct section of the back piece.
When you glue the topmost piece down, slip in a little folded piece of 1/4" wide ribbon. That acts as a hanger. (Or, if you have no ribbon, use some yarn or a bent piece of wire.)

When you have the whole thing assembled, it's time to put it under a stack of heavy books to dry. (The pressure will make all the pieces lie nice and flat.) If you have a little glue oozing out at the sides, like you see here. wipe it away with your fingers before you put any books over it.
Leave your ornament under those books for a few hours or overnight. And you're done!
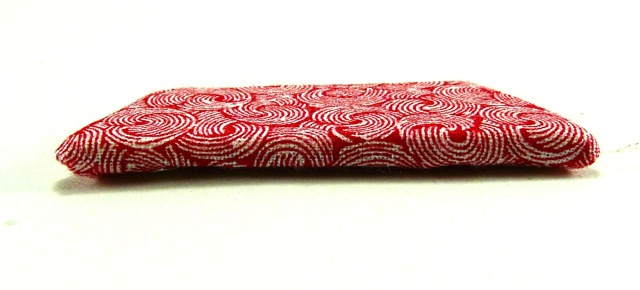
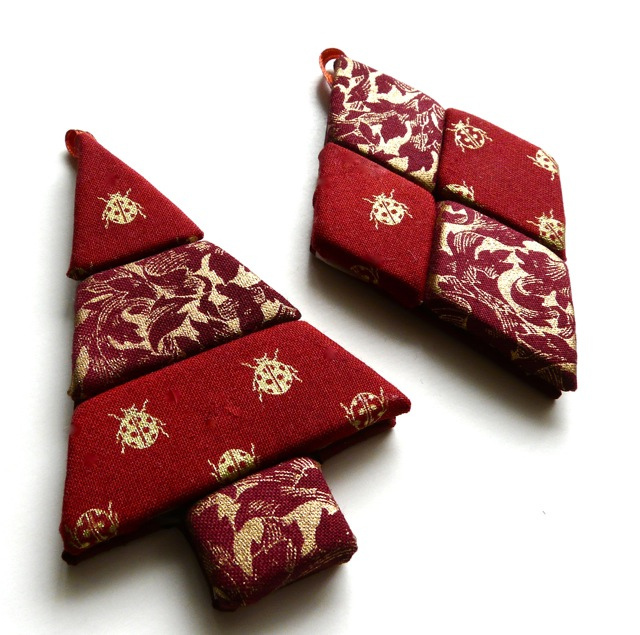
There are so many cool ways to interpret this project. I love using fabrics with metallic accents, because they look a lot like Japanese washi paper.
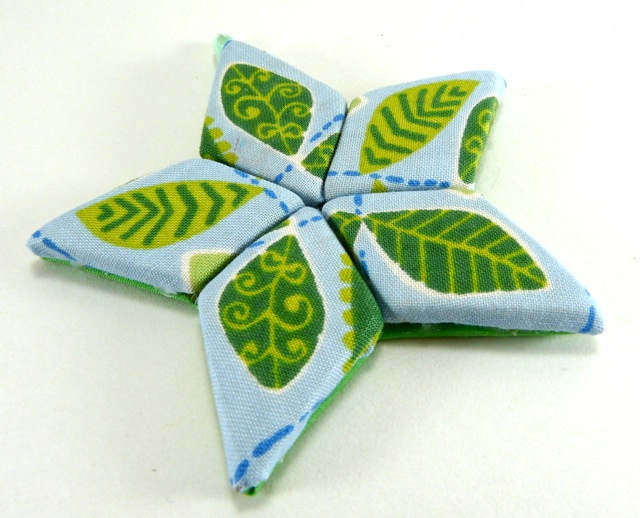
Here's one where I "fussy-cut" my fabric to take better advantage of the leaf design.
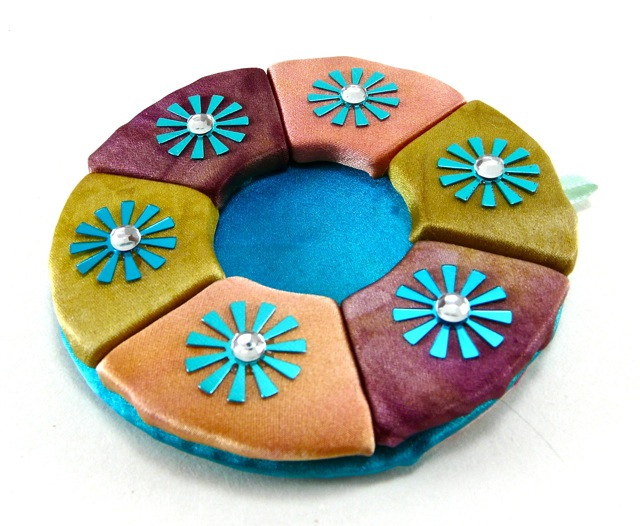
…And here's one covered with some beautiful dyed silk Pat sent me. It has such a pretty luster to it.
(Incidentally, the wreath is probably the most challenging shape of the four I designed, due to all the curved edges. I'd recommend making one of the other shapes first. Also, if you make a wreath, I recommend not cutting two identical cardboard shapes at first. Instead, cut one out, cut it into sections and "upholster" it, and then re-assemble them. Trace around this re-assembled wreath to get your backing piece.)
If you make one of these, I'd love to see! Will you post a photo to the CraftyPod Reader Projects Flickr Group?

![[Valid RSS]](../../../sites/files_cp7/valid-rss.png "Validate my RSS feed")
Comments
Can't wait to make these for my 7 children and 17 grandchildren!
Is there a pattern for the dove some have talked about? Thanks
Hi, Deborah - Sorry, the dove was another commenter's idea. I don't have a way to know if she shared a pattern on her blog or not. I didn't make a dove pattern.
I am thinking of this as a 1st grade craft during a class party. Any chance you can help me figure out how many total yards of fabric Idneed to make 100 craft kits? (Ambitious prep, I know, but we were asked to find tree worry ornament ideas!!)
Pages