You are here
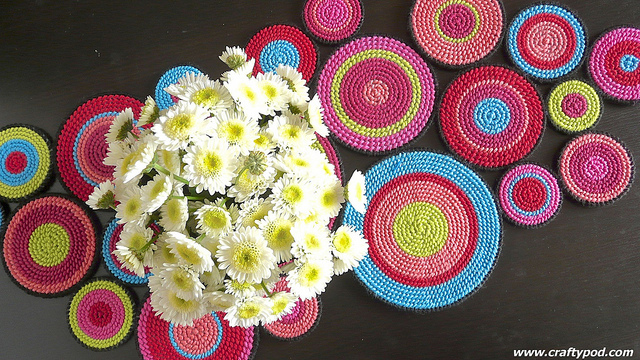
How to Make a Table Runner From Plastic Canvas Circles
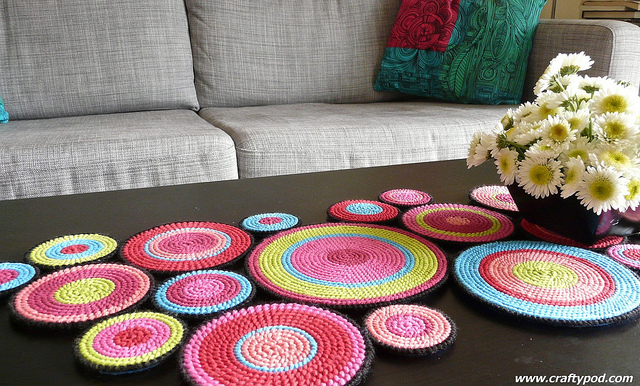
Most big-box craft stores carry these intriguing PC circles, and they're handy for lots of projects. I love this table runner for its free-formness. All you need to do is stitch up a bunch of circles, and then put them together in any configuration you like – you could make a more circular arrangement for a round table. You could make a longer and thinner one for a credenza. See my point?
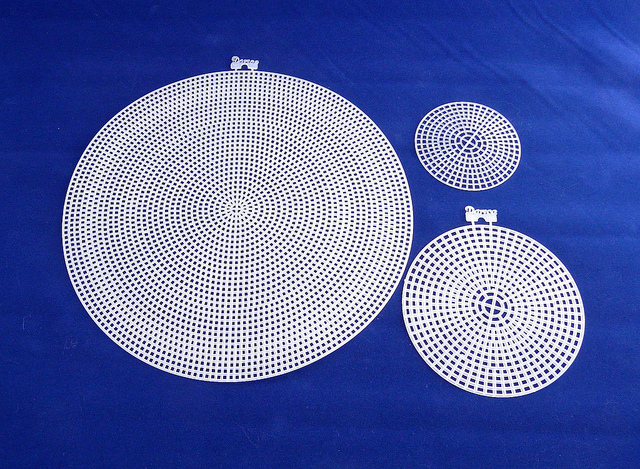
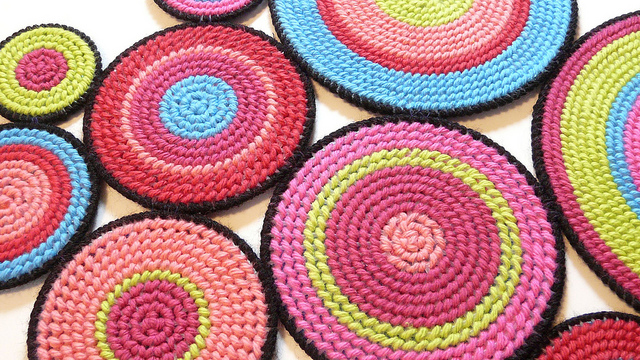
These are the widely-available circles sizes: 6", 4.5", and 3". You may notice that my table runner seems to have lots more sizes than these in it – that's because I cut some of my circles down a bit to create more variety. (All you do is cut away the outer rows until you're happy with the size.) I used 21 circles in my table runner; you might need more or fewer than that.
If your local craft stores don't have circles, you can get them online.
Stitching the circles
I stitched my circles with good ol' tent stitch. And my PC tricky-tricks from the wall-hanging project totally apply here, so take a quick look back at that post.
You could really use any decorative needlepoint stitch here, as long as it'll conform to the circular pattern of the holes in the canvas.
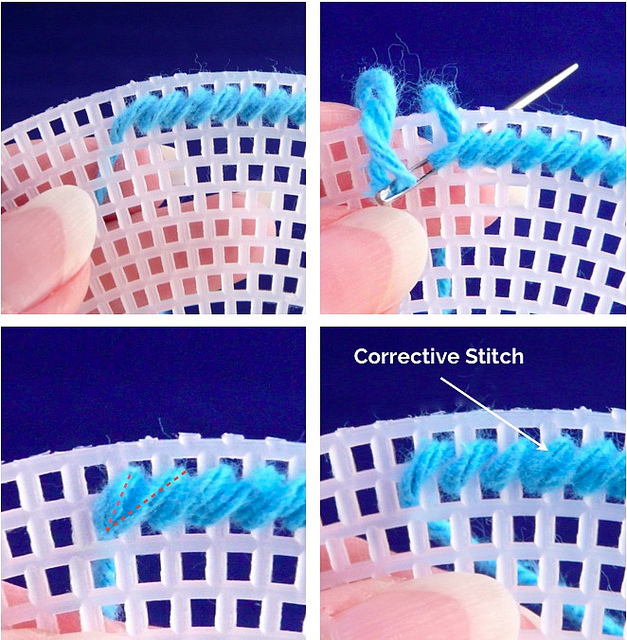
There's one important stitch to know when you're tent-stitching PC circles. Depending on their size, these circles will have places where the holes don't line up perfectly, or where they're a bit larger than normal. That'll sometimes cause your stitches to get too long and too horizontal as your work your way around.
When that happens, simply take what I call a "corrective stitch." That's where you start your stitch in a new hole, but you end it in the same hole as the previous stitch. That corrects the angle, and your stitching will look more normal going forward. You'll need to make more corrective stitches in your rows as you get closer to the center of most circles.
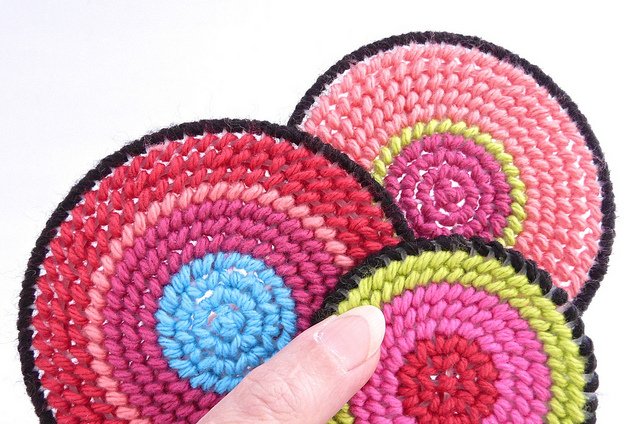
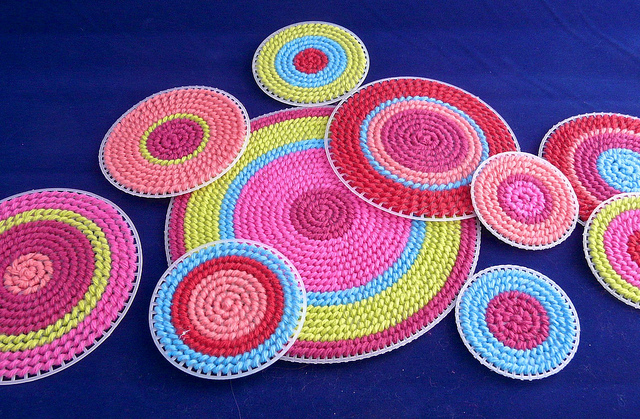
I was pretty loosey-goosey about my color placement as I stitched my circles. I chose six colors of my favorite Sugar 'n Cream. I started at the outer row of each round and stitched toward the center, changing colors when I felt like it. (I do loves me some serendipitous crafting.)
After that, I edged all the circles with overcast stitch. Some circles need two stitches in each hole to get good coverage, and others need only one stitch per hole. That all depends on the size of the circle and where you might have trimmed it.
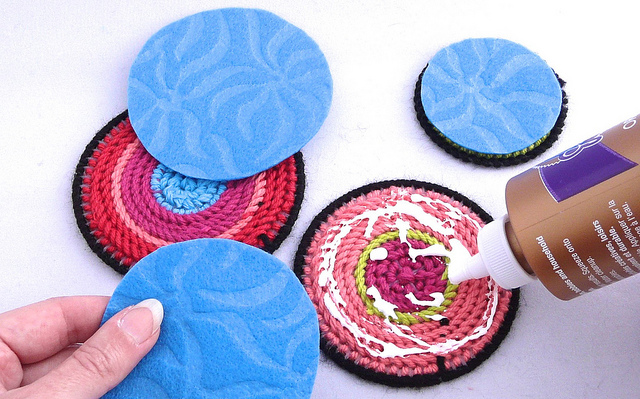
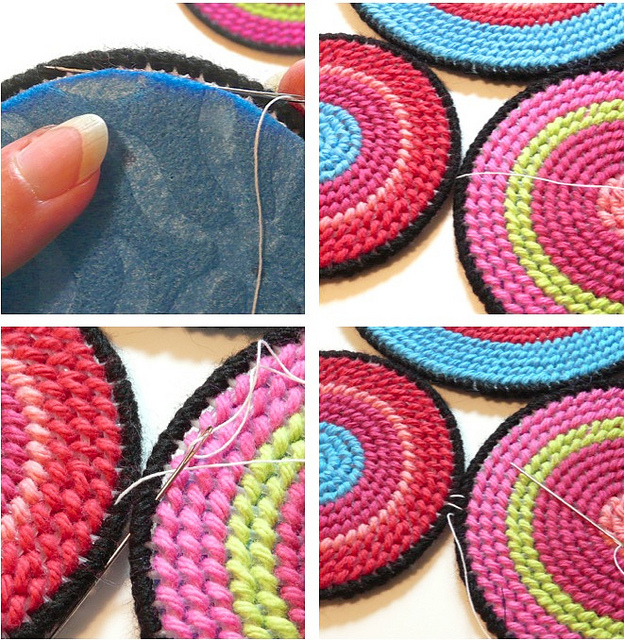
With all the circles stitched and edged, it's time to back them. I just traced each circle onto some felt with a fine-point marker, and then cut them out just inside my tracing line. I then glued the felt circles to the backs of the PC ones, and placed them under some heavy books to dry.
(Pro tip: PC has big openings that allow glue to ooze through. Put some wax paper on both sides of your circles to protect your books and your work surface. You'll thank me.)

Then I spread my finished circles out on a table and moved them around until I had a configuration I liked. I highly recommend taking a photo of that layout – you'll need that to refer back to again and again as you join these puppies together. (Seriously, don't skip this step. I always think I'll just remember how I had them placed, and I never, ever do.)
Joining the circles
The next step is to stitch those circles together. It's easiest to do this with your circles all laid out in front of you, and that photo you took earlier close at hand.
Before we get into process, I'll tell you that the whole secret to a nice, flat table runner is small points of contact. It's tempting, when you're stitching these things together, to stitch along a wide area so that the two circles are totally immobile against each other. That's a mistake! You need your joined circles to be able to "roll" a little to this side or that side - that way, as you keep adding new circles, you'll be able to gently adjust all their positions so they fit together neatly.
By the time you have all the circles joined, trust me – the whole thing will be good and stable.
I recommend using a strong, fairly thick thread for joining your circles. Upholstery thread or quilting thread are good choices. You can also work with a double strand of regular sewing thread, but with doubled thread, there's always a possibility that it'll get tangled as you stitch.
I'll demo the join using a contrasting color of thread, but you'll want to use one that matches your edging.
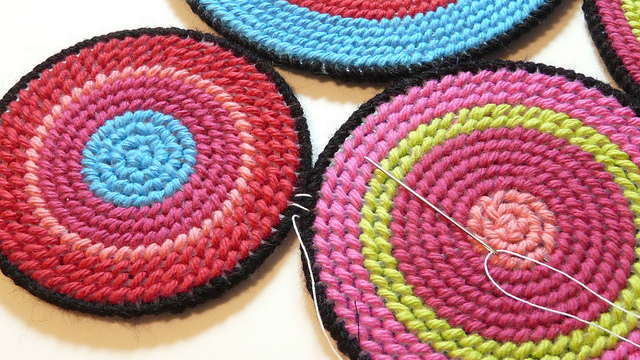
Start joining with one of your larger circles that's near the center of your layout. Thread up a sewing needle with about 12" of thread, and tie a nice big knot in the end. Pass your needle through some stitches at the back of your first circle – all we're doing here is catching that knot in the yarn to anchor it. Pull the needle and thread all the way through.
Set the circle down again, placing it in its location in your layout. Turn this circle so that the thread is coming out right where this circle will connect to the one next to it.
Next, pass your needle down through the edge of that adjacent circle as shown. (It's best to do this pass with the two circles laying flat on the table.)
Repeat this process one more time to get two stitches between the two circles. Now it's okay to pick them up and hold them in your hands. Stitch them together a few more times, pulling the thread fairly tight. Just make each join point is no more than 2-3 holes wide – you can make several stitches in each of those holes for strength, but keep that join point small!
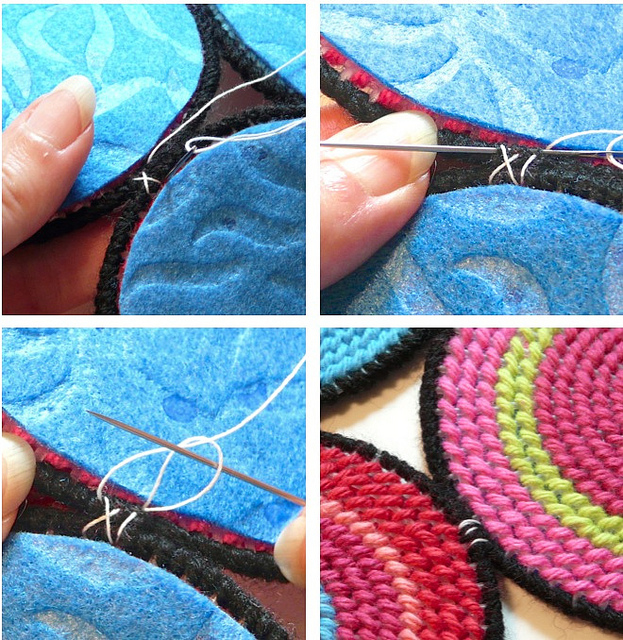
When you're done with those stitches, it's time to make a good, strong knot at the back. Pass your needle under several stitches and pull the thread through until you have a small loop. Then, pass your needle through that loop two times. Pull the thread tight, and you have a knot. Cut your thread and move on to the next join point.
I recommend checking the alignment of all your assembled circles frequently against your photo as you work on this part of the project. Lay your runner back out flat on your table before you join each new circle.
When you've joined all your circles, you're done! You might pick up the finished runner in your hands and see if there are any points where the join between two circles feels a bit floppy. You might want to go back and do some more stitching at those points, just to be extra awesome about things.
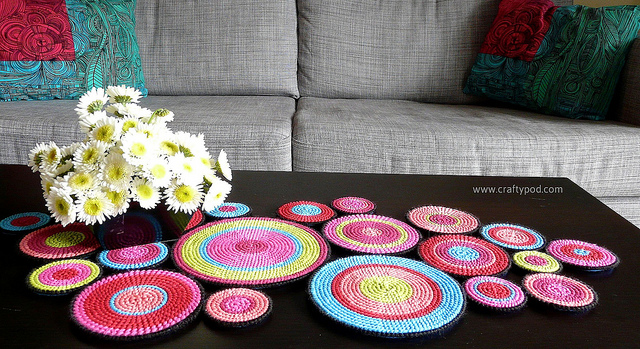
I think this design would also be pretty rendered in neutral colors, or as neutrals with little pops of color in the centers, or even as a monochromatic kind of thing. What variations will you come up with?

![[Valid RSS]](../../../sites/files_cp7/valid-rss.png "Validate my RSS feed")
Comments
Wow. That's is really cool. I've never understood the allure of plastic canvas but you've really opened up my mind with this project. It's gorgeous. And a great tutorial.
Thanks!
I absolutely love this idea! Your combination of colors and circles size is also perfect to my taste! You've inspired me! I'll run to the store to get material! :) Thank you sou much for sharing this beauty!
This is absolutely gorgeous!!!! The color scheme is amazing and AMEN to you and all fellow stitchers who like to think outside the box. You help keep this dying art alive. HAPPY STITCHIN' TO ALL!!! God Bless