You are here
How to Make a Choose-Your-Own-Design-Adventure Ornament (with Plastic Canvas!)
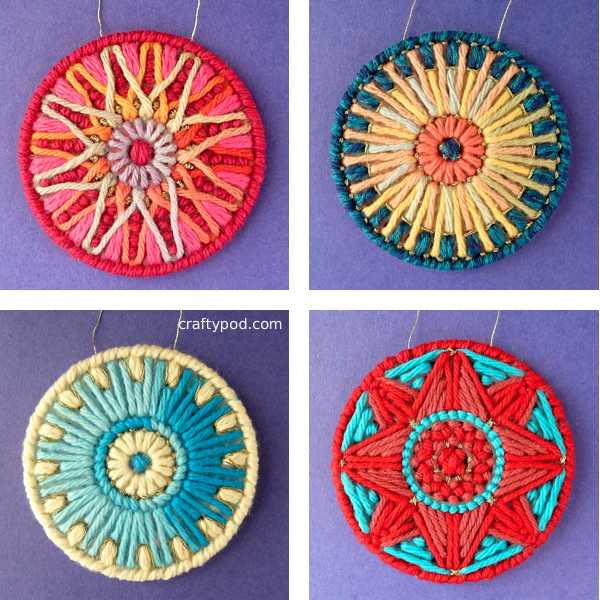
So, I love making these little guys – it's just the most relaxing, serendipitous process of creation. That said, I really struggled with how to best represent this process in a tutorial. I think it's way more fun if you follow your own path of discovery rather than follow my specific pattern.
So I've tried to give you a good framework for serendipity here – in other words, there's no pattern for these and you don't need one!
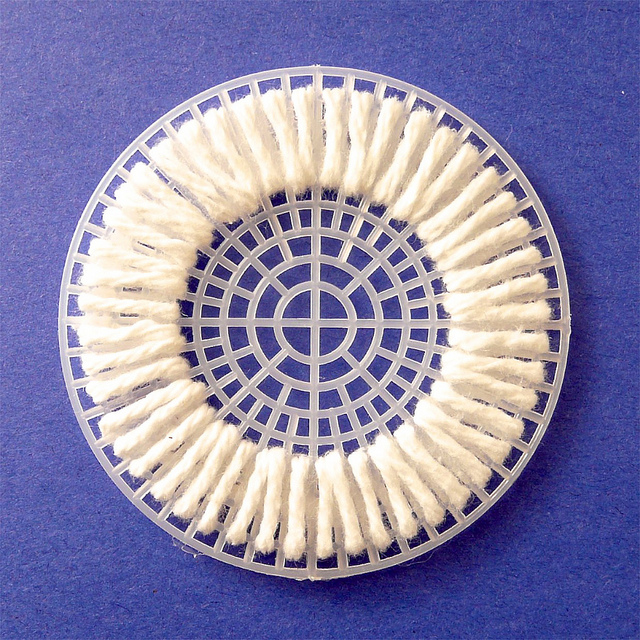
This project works best with 3" PC rounds, which are commonly available (cheap!) at big box craft stores or online.
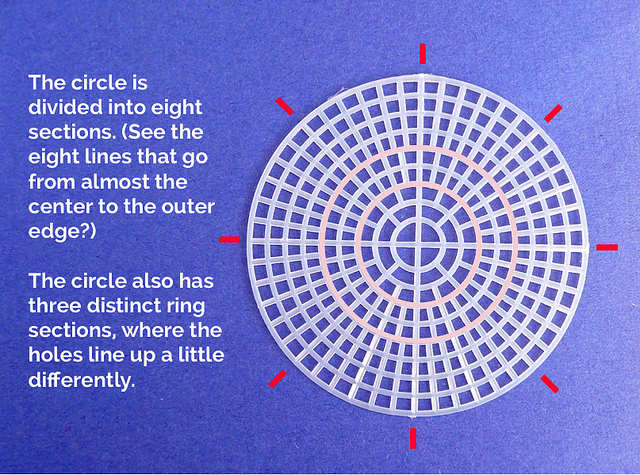
Take a look at the grid of this thing. In the center, it's divided into eight parts. And those eight divisions continue out to the edges. There are some definite "rings" within this structure, where the alignment of the holes changes a bit. And all of that is the basis for creating an unlimited number of stitch designs, as you'll see.
(Incidentally, 5" PC rounds have a whole different structure. I like them less for this project, but feel free to give them a try.)
So, get yourself some dribs and drabs of worsted weight yarn – this is a great way to use up your scraps. I love using variegated yarns in this project because they create such pretty colorwash effects, but you don't have to. You'll also need these things:
- A large-eyed blunt needle
- Scissors
- A scrap of felt (optional)
- Some white craft glue (optional)
- Some embroidery floss for a hanger
- Some decorate-y things (more on those below)
OK, from here, my instructions are gonna get more minimal. I just want you to start stitching on your PC round and seeing what happens. But if you're not sure how to begin, take a look at the sample approaches below.
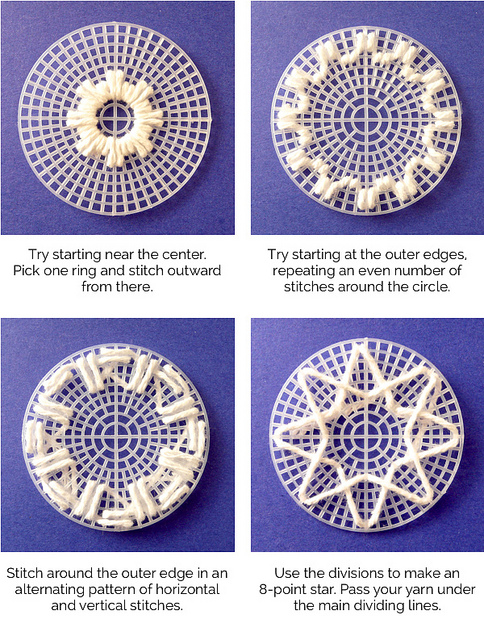
Since this circle is divided into eight parts, just remember to work with even numbers. If you're making a pattern of stitches, base it on an even number of stitches. If you're stitching across several holes in the canvas, be sure to stitch across an even number of them.
...And keep your eye on those eight division lines in the canvas – if you keep your design tied to those, you can't go wrong.
If you're really stumped on how to begin, just pick a ring and stitch a band of your first color. (Again, doing this with variegated yarn makes its own pretty design.)
If you haven't used plastic canvas before, you might want to take a look at my three main tricks for this medium in this post. And it also answers your unspoken question of "How the heck do I knot this yarn?!"
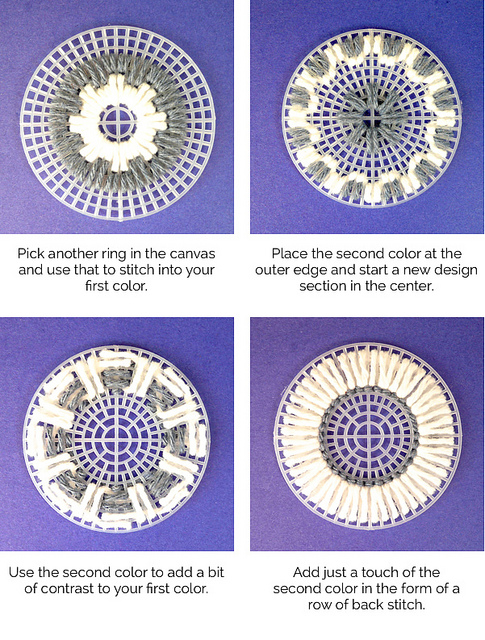
Then, switch colors and add another layer of stitches. Again, I've set up some samples above, but you don't need to follow them. What is your PC telling you it wants next?
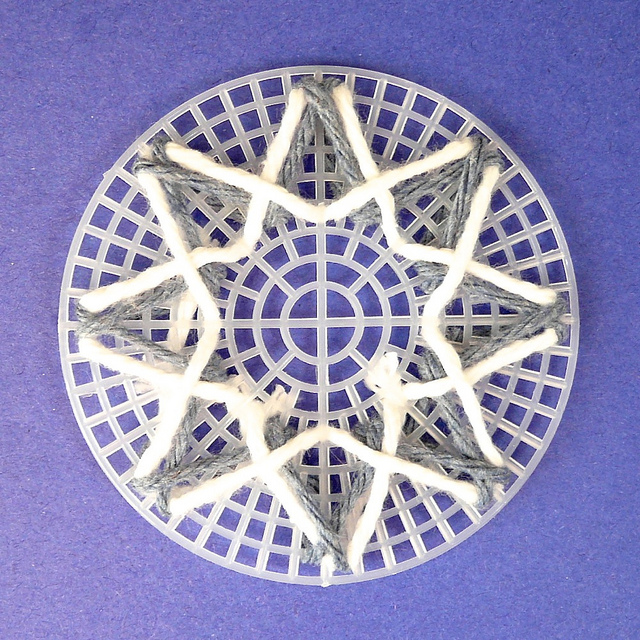
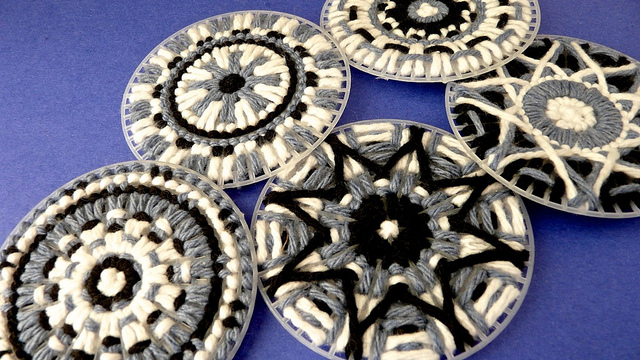
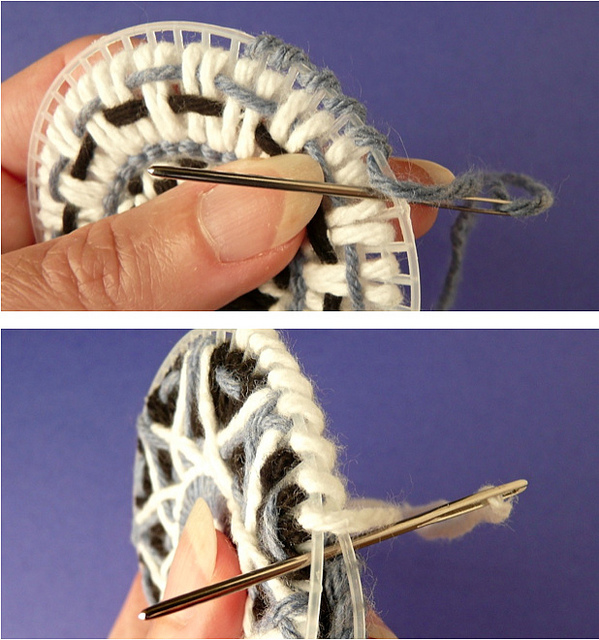
Keep in mind that in addition to stitching, you can weave your yarn over and under previous stitches in your design. Here, I stitched along the original star design, but I wove the grey stitches under the white ones. It's easy - just slide your needle under there! And if you skip down a couple photos, you'll see even more weaving at work.
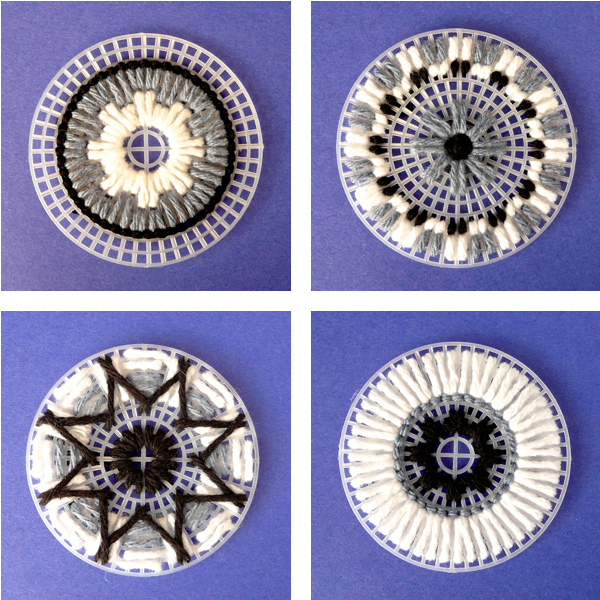
Just keep going, adding more colors and stitches until you're happy with the look of the thing. And anytime you're not happy, no sweat! Those stitches come right out. This is about creative exploration, my friends - enjoy the process!
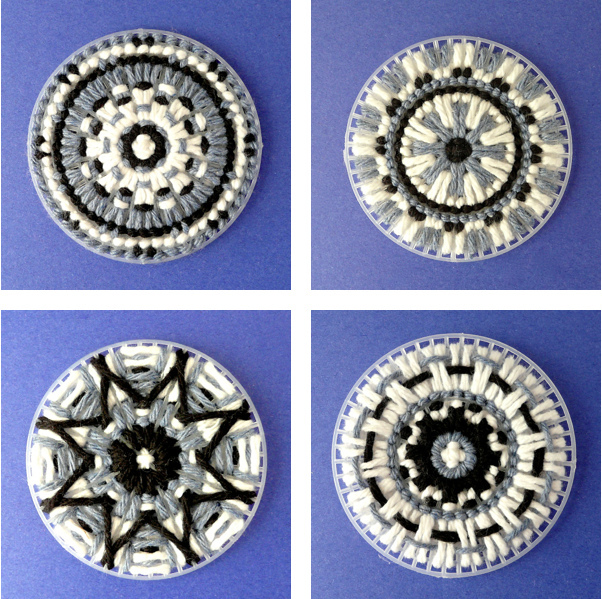
None of these designs had any pre-planning whatsoever. I just added and subtracted stitches. It all works out, I promise.

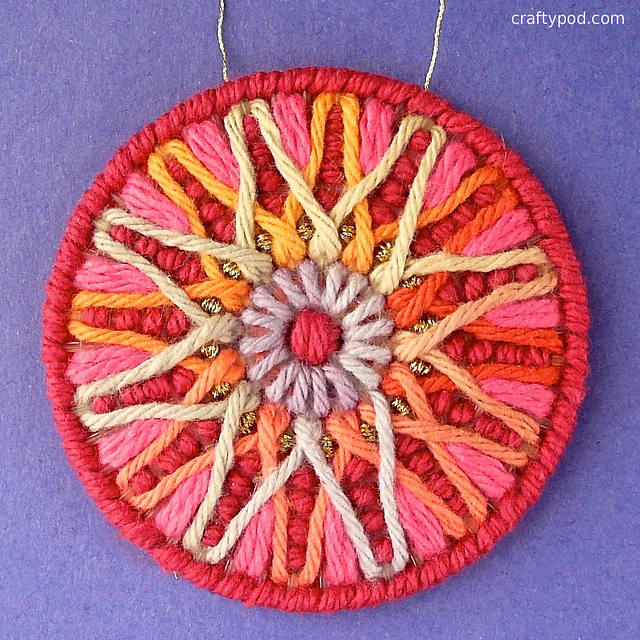
If you have some metallic embroidery floss on hand and feel like it, you can also add some little bits of sparkle to your design. I basically took several tiny stitches at key points. I ran the end of the floss under the other stitches on the back of the work to "knot" it at the start and end.
You could also add sparkle with little dabs of glitter glue. Or you could sew some sequins or seed beads right to your ornament.
When your design is done, finish your ornament by covering the outer edge with an overcast stitch. You can do this one of two ways:
- Stitch around a single ornament.
- Put two ornaments back to back and stitch them together around the edges.
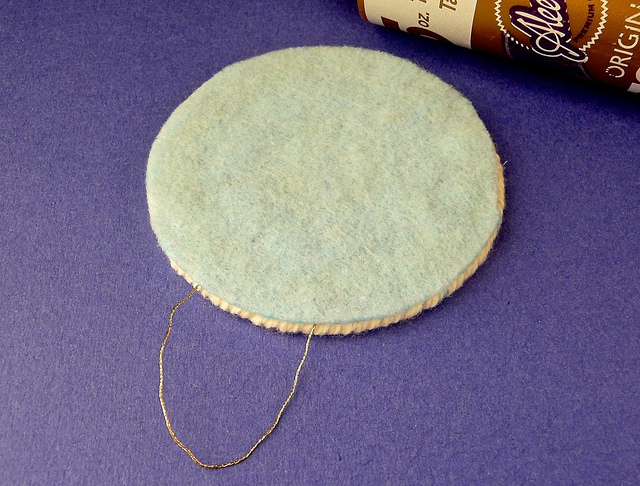
If you stitch around a single ornament, then cut a circle of felt to match it and glue that to the back to cover it up. If you want to add a hanging loop, just take a 5" length of embroidery floss and tie it into a loop. Insert one end of that between the ornament and felt.
Place your glued ornaments under some heavy books to dry. Put a layer of waxed paper between your books and ornaments, because glue can ooze through plastic canvas sometimes.
(If you want to make two-sided ornaments, just make that loop of floss and stitch it into your overcast stitches.)
I think this is a great project to do with your family or a group of friends as part of a holiday gathering. It's so much fun seeing what everyone comes up with. You could even do a gathering where everyone brought and shared their yarn scraps.
Now, go make some cocoa and have a splendid time!

![[Valid RSS]](../../../sites/files_cp7/valid-rss.png "Validate my RSS feed")
Comments
Wow! Ingenious! I look at the circles for plastic canvas and just think, okay...what else can you do with these! So I think these are incredible. Thanks and I will definitely use your designs!
I have been put on strict bed rest for the last 4 months of my pregnancy. This seems like the perfect craft to do laying down. May I ask what type of yarn I should use. I don't know a lot about yarn and will have to send someone to pick it up. Any advice is much appreciated. By the way I love your work. So beautiful!
Thank you so much, Rebecca! This would be a great craft for bed rest.
I use cotton yarns often - I like their texture and lack of stretch. The downside of cotton is that it gets a bit worn as it's being pulled through the little holes in the canvas, so it's wise to stitch with shorter strands to keep this to a minimum. Sugar n' Cream is a brand available at many Michaels and Jo-Ann stores. It's inexpensive and comes in pretty colors - especially variegated.
If you'd like a yarn that stands up to wear better, then any worsted weight acrylic or acrylic-wool blend will work great. Acrylics do have a little tendency to stretch as you pull them, so just be careful not to pull your stitches too tight as you go - that'll make the yarn thinner and you won't get as good of coverage on your canvas. Lion Brand Yarns are available at Michaels and Jo-Ann stores, and many of their styles are great for PC. Just have your designated shopper look on the paper band/label for the word "worsted," so you know it's thick enough.
I hope that helps Please let me know if you have any other questions. And good luck with the end of your pregnancy!
Gorgious done, i'm a adventage embroidery girl so i like this very much. awesome, and brilliant done.
Really, i have bought those circles of plastic canvas years ago and t hought what the heck must i do with them.LOL
but this is the big reason i supose.;-D
thank you for the sharing and the tute.
THANK YOU! I am in an Embroidery Guild. We have an ornament exchange every year and it is so hard to come up with something the girls haven't seen. This is just perfect! I just found your site through Shiny Happy World and am so happy that I did!
Hi, Lacey - Yay! I hope your guild enjoys the ornaments, and I hope you have fun with the design-discovery process. Thanks for stopping over here!
I really want to make these!
These are so beautiful they take my breath away! I've done plastic canvas for years - making totes, toys, all sorts of items, but never gave ornaments (or mandelas) a thought. These have me digging into my old stash to get started. I'm bored with crocheting right now and this would give my creativity a kick that it needs - and a way to use up my yarn scraps. Bless you for sharing this. It's incredible work!
I love this! I've always been a big fan of embroidery in the round and also riotous color. That said, you also hooked me with the high contrast of black and white. Thanks for showing us this wonderful work. I can already tell it will be one of those things that sticks in my mind for days.....