You are here
How to Make a Simple Valentine Sachet (This Time with English Paper Piecing)
Here's a sweet little V-Day gifty, incorporating a tiny bit of my current favorite craft, EPP. It's just six patches, so the piecing isn't time-consuming at all. In fact, once you're comfortable with the process, you should be able to make this entire project in about 90 minutes. My tutorial may look long because I'm a nerd for detail, but I promise, this is a quick project!
Here's what you'll need:
- Three fabric scraps for the hearts
- Two 6" squares of fabric
- Glue stick
- Scissors
- Pins (applique pins, if you have 'em)
- Removable fabric marker (see below)
- Hand-sewing needle and thread
- A little six-strand embroidery floss
- Jewel templates (see below)
- Thread that coordinates with your fabrics
- A handful of fiberfill
- A few tablespoons of lavender buds, rose petals, or cedar shavings

The EPP Part
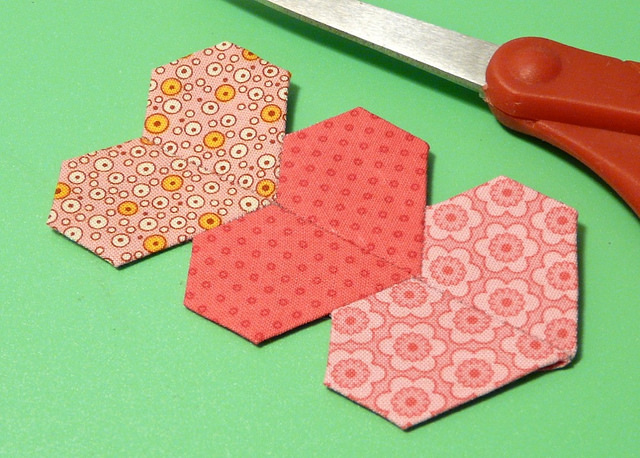
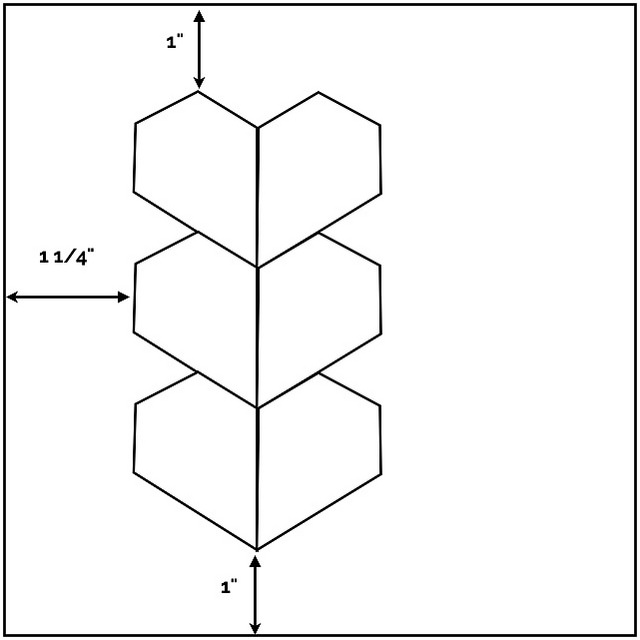
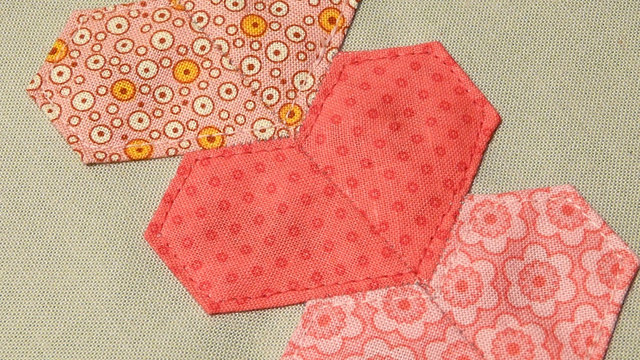
The English Paper Piecing template we're using here is called a "jewel." It's kind of like a hexagon and a diamond got married. You can get these templates by the pack from Paper Pieces (5/8" size), or you can download this PDF, print it to cardstock, and carefully cut out the templates. I like EPP for this part of the project because it makes such a nice, crisp applique motif.
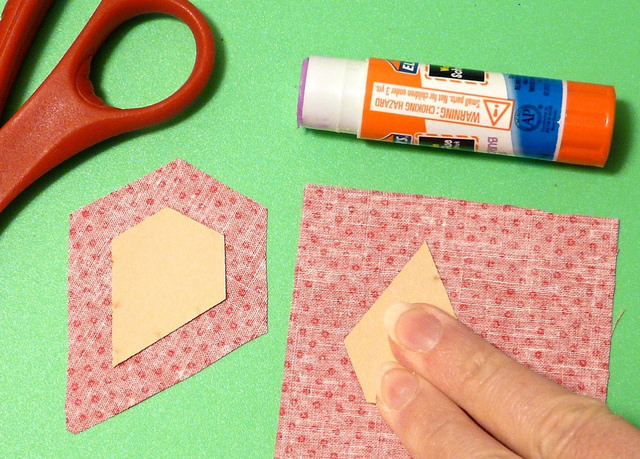
Press your fabrics so there aren't any wrinkles. Then put a small amount of glue stick on the back of a jewel template, and press it to the wrong side of one of your fabrics. Cut the fabric around the jewel so there's a 3/8" margin on all sides. Do this with the other five jewels. You want to end up with two jewels in each of three fabrics.
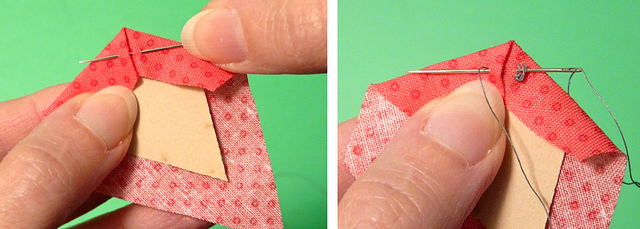
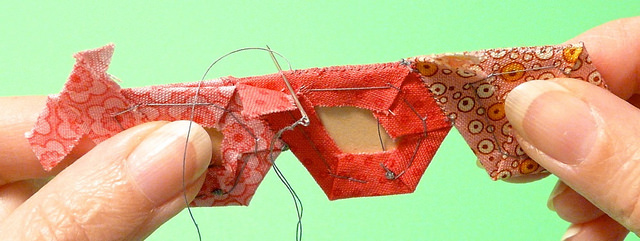
Now, to baste the fabric to the template. Thread a needle with a single thickness of thread and tie a good knot in the end. Start basting the jewel at the blunt end, basting away from the long point. Fold the fabric over one short edge of the template and finger press it. Then fold the next edge over and finger press that.
Take a little stitch through the fabric at the point where the two edges meet. Don't pass your needle through the paper template at all - just skim it through the layers of fabric and back up. Then take a second, identical stitch.
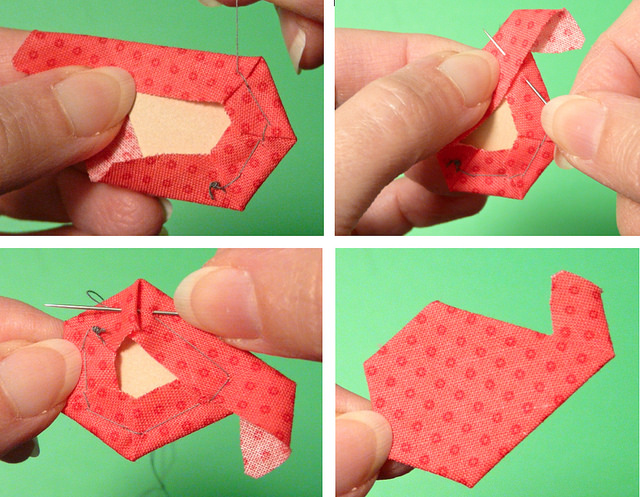
Now, work your way around the rest of the patch, folding each new edge of fabric over, finger-pressing, and taking tack stitches at each corner. Do this even at the long point; just take a slightly bigger tack stitch there, since you're tacking over the raw edge. Your finished patch should be smoothly covered with fabric, with no basting stitches showing on its front.
Baste the other five patches in the same manner.
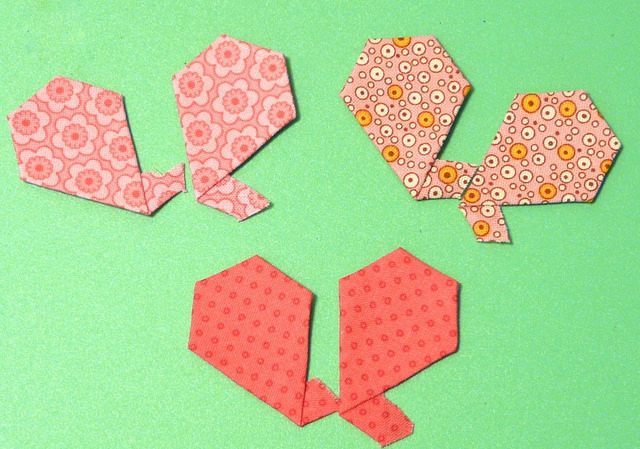
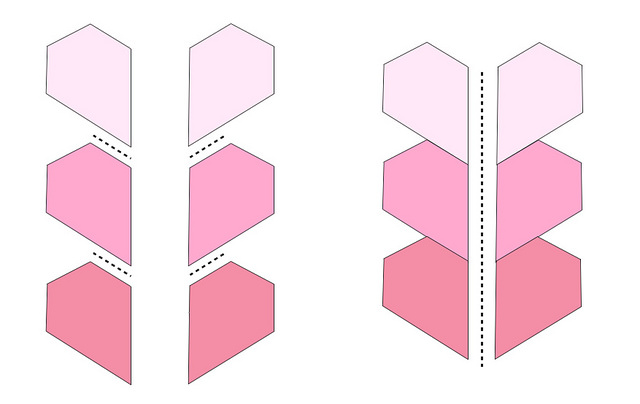
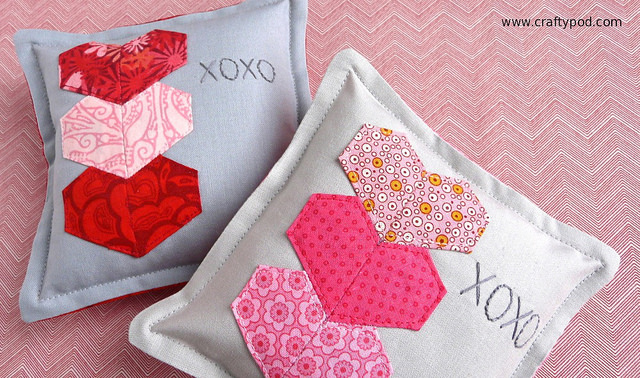
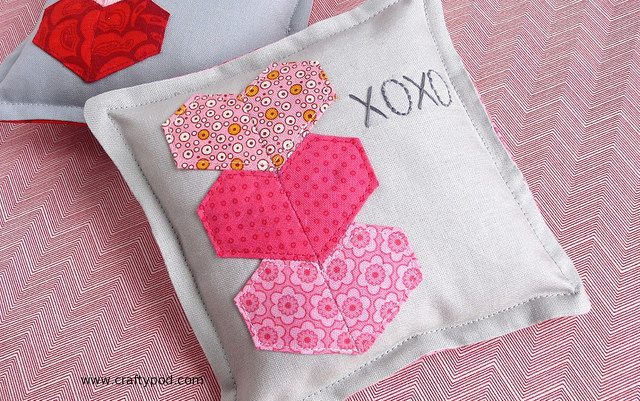
Now, we're going to sew these patches together into two strips, and then we'll sew the strips together to form a stack of three hearts, as shown above. Take a moment and decide what order you want your fabrics in. It's helpful to lay the patches out on your work surface in the configuration you want.
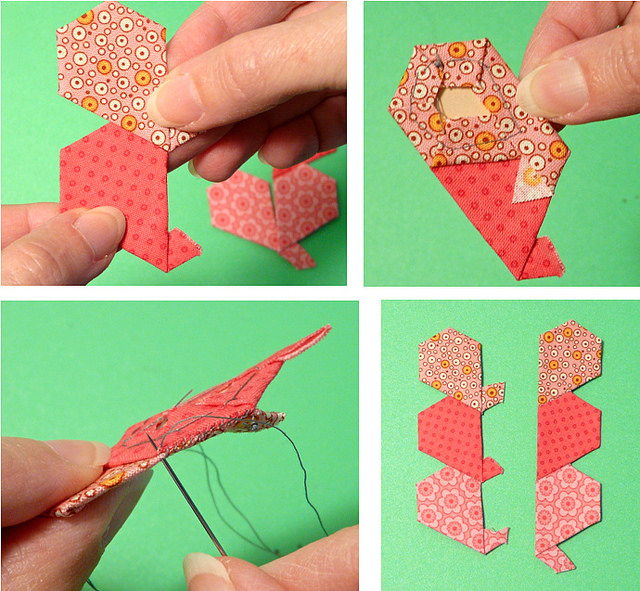
Start with the topmost two patches on one side of your heart-stack. The easiest way to see how to sew them together is to first hold them side by side as they're supposed to be configured, and then flip the upper one over the lower one so their right sides face and the edges you need to sew together are lined up.
We're using a whipstitch to sew the patches together. It's a very short seam that will only travel partway along one of the two patches. (Incidentally, your patches will all have little "flags" of fabric at their tips; just fold these out of your way when you're sewing near them.)
When you have these two patches sewn together, repeat the process to add the third one. Then make another, identical strip.
Now, place the two strips together with right sides facing. Whipstitch along the center seam line, taking care to match up the points of the hearts. When you've sewn the center seam, press the whole thing nice and flat. There will be little "flags" of fabric sticking out from the bottom heart. Just fold them to the inside and press them flat.
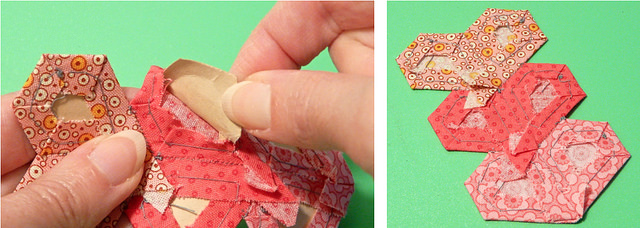
Now, you can take out those paper templates! Reach into a patch until you feel the edge of the paper. Pinch that in your fingers and peel it right out. Do the same with the rest of the paper templates. Then press your finished applique unit again. Good job!
The Sachet Part
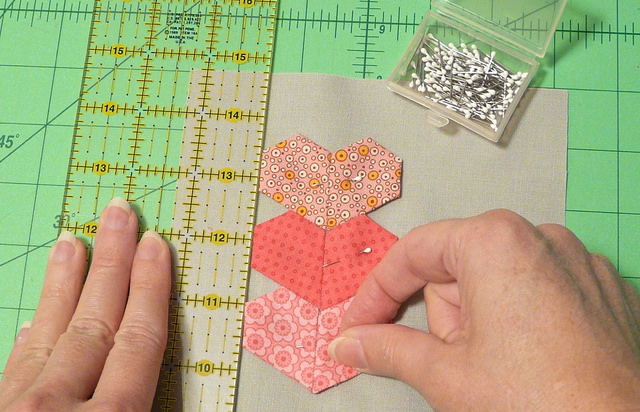
OK, so here you are with this this cute EPP unit. Pin it to one of the 6" squares of fabric. You can line it up any way you like, but above you can see how I did mine. (I'm using little applique pins here - they're so much easier to sew around.)
Machine-stitch close to the edge of each heart to applique it to the fabric square. You might want to use a walking presser foot for this step.
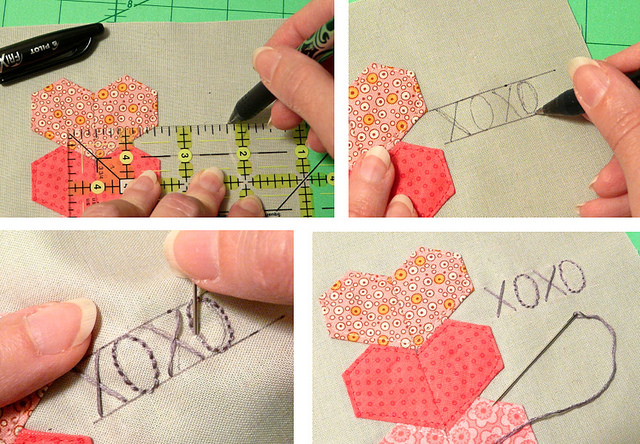
I opted to do a little embroidery on my sachet, but you can skip this step if you like. I used a quilting ruler and a FriXion pen to draw two guide lines on the front of the sachet, 1/2" apart. (FriXion pens make lines that vanish when exposed to the heat of your iron. They are dandy. You could use a water-soluble marker instead, but do not iron over the lines! They'll become permanent.)
I drew my "XOXO" freehand between the guidelines with the FriXion, and then I stitched over the drawing with straight stitches for the X's and back stitch for the O's. Then I pressed the whole thing to remove the lines. Boom!
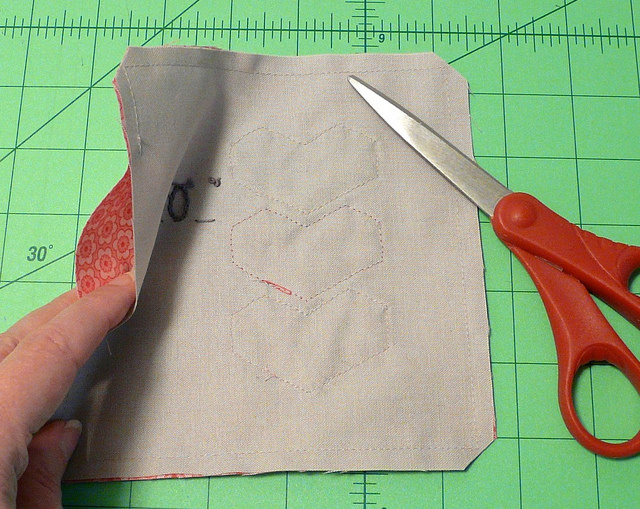
To finish up, then, pin the front and back of the sachet together, right sides facing. Sew around all four edges with a 1/4" seam allowance, leaving about a 2 1/2" gap in the seam on one side for turning. Clip the excess fabric at all four corners.
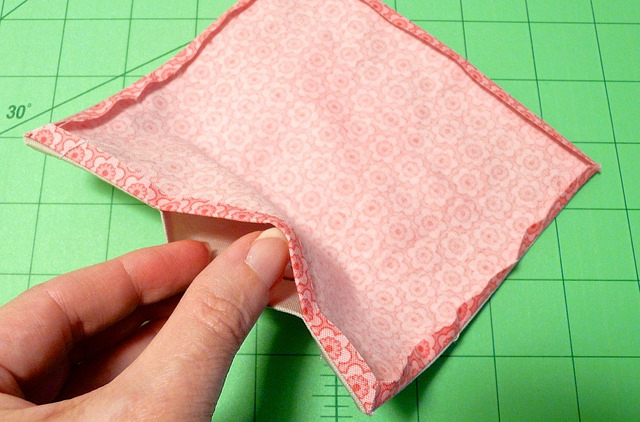
Here's one of my favorite tricky-tricks: when I need to turn something right side out, I like to press the seam allowances open before I do it. There's no need to finagle the square around so the seams actually are open - just fold over each seam allowance as you see here and press it flat. Do that on both sides of the sachet. This little process gives you nice, crisp edges when you turn the sachet, and it also makes a beautifully neat edge along the opening.
So press those seam allowances and turn your sachet right side out. Poke the corners out with a chopstick so they're as sharp as they can be. Then, press the turned sachet flat once again.
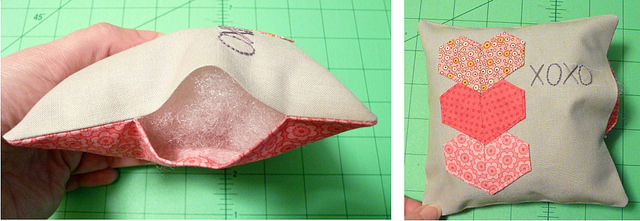
Stuff your sachet somewhat loosely. I know that's a terribly vague instruction. The thing is, you don't want this thing stuffed firmly because in a moment you'll machine-stitch around the edges, and this will moosh the stuffing toward the center. For this size sachet, I use a ball of fiberfill about the size of a large orange. I like to put about half of that into the sachet, then pour in my scented stuff, and then stuff the rest of the fiberfill in on top of that.
When it's stuffed, sew the opening closed with a ladder stitch.
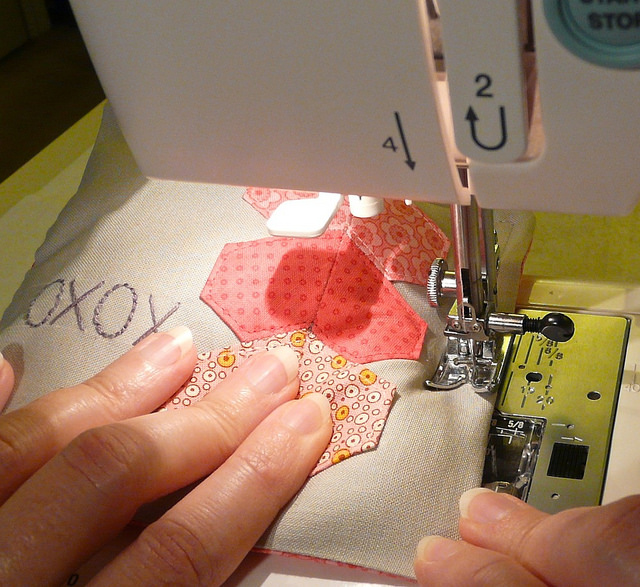
Now, make sure you have a standard presser foot on your sewing machine. Place the edge of your sachet under the presser foot, lining its edge up with the edge of the presser foot – just as you would for any 1/4" seam. Stitch 1/4" from all four edges of the sachet.
Take this step slowly, and be careful to keep the sachet flattened out with your fingers as you're sewing. It helps to gently stretch the edge toward you. Stitch around all four edges like this.
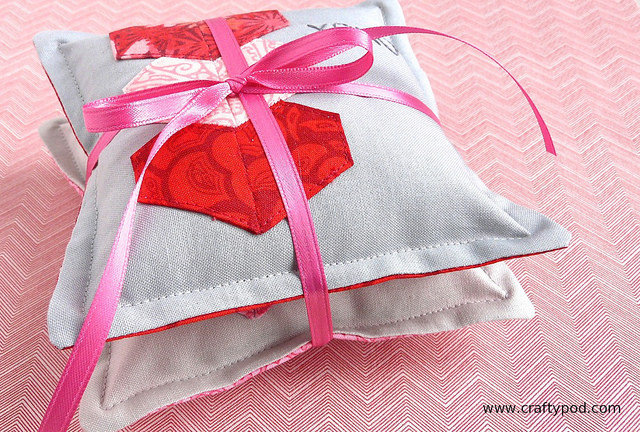
…And that's that! Happy V-Day to all!


![[Valid RSS]](../../../sites/files_cp7/valid-rss.png "Validate my RSS feed")
Comments
Beautiful!!! I am thinking it would also make a lovely pin cushion! This epp shape is a natural for hearts and this little project shows them to their best advantage!
You have been and continue to be a source of inspiration and learning and creativity. Even though I do happen to enjoy regular personal access, I have found much here in this space over the years that has enriched my crafty life. Thank you for the time, talent and inspiration you so generously share. And Happy Valentine's Day!
Awwww! You are the best Mom of all time!