You are here
How to Make Japanese-Inspired "Upholstered" Ornaments

I got the inspiration for these ornaments a couple years back, when I saw this post on Zakka Life. I was also inspired by Oshie, an old Japanese craft in which you use small pieces of silk and paper to make padded shapes, which fit together into a particular images. You can see some stunning examples here.
My version is greatly simplified from the traditional craft, but I love the tailored quality these things have! And, due to the whole Kanzashi thing, I have vast stores of tiny fabric scraps. This project is an excellent way to use those up.
So, wanna make one? Here we go. First, you'll need some thick, fairly rigid cardboard. Thick chipboard or mat board work well here. Corrugated isn't a good choice - it can bend too easily.
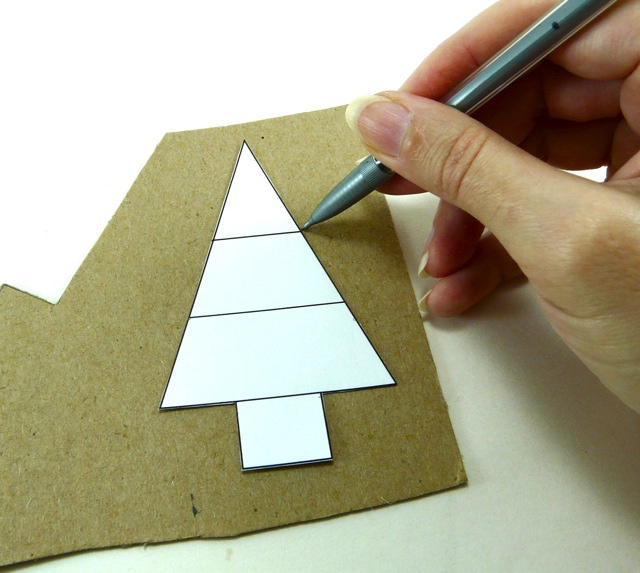
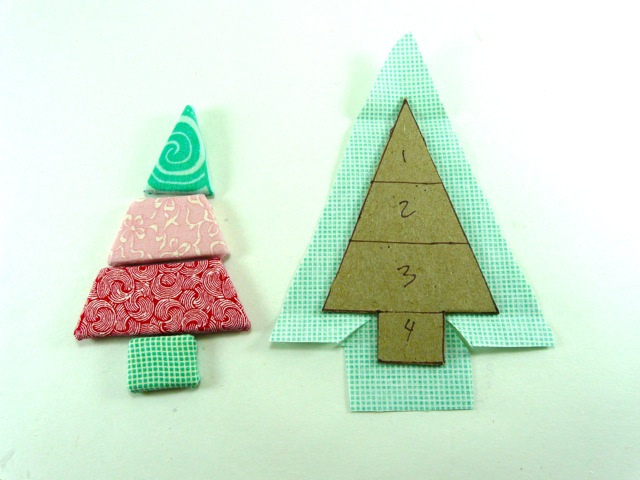
I made you guys a downloadable set of four design templates, so feel free to use those or make up your own design. To get started, trace your shape onto the cardboard two times. See the dividing lines on the shape? Transfer these to the cardboard as well.
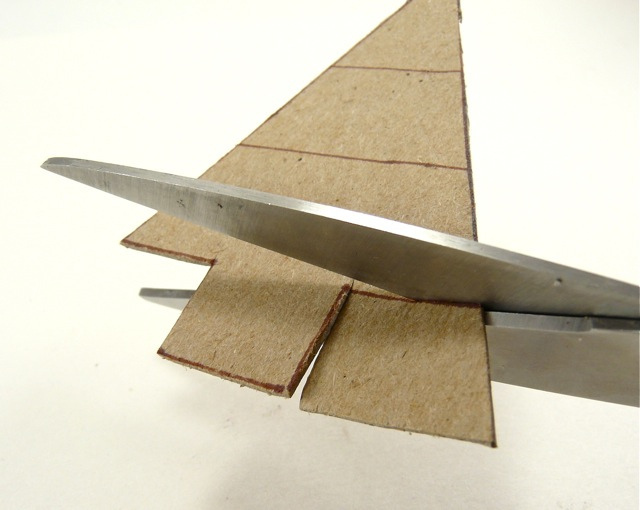
Carefully cut them out, making sure you don't bend the cardboard in the process. The easiest way to prevent bending is to always cut in to corners, not around them.
(If you wanted to be fancier than me, you could also cut your shapes out with a craft knife and ruler.)

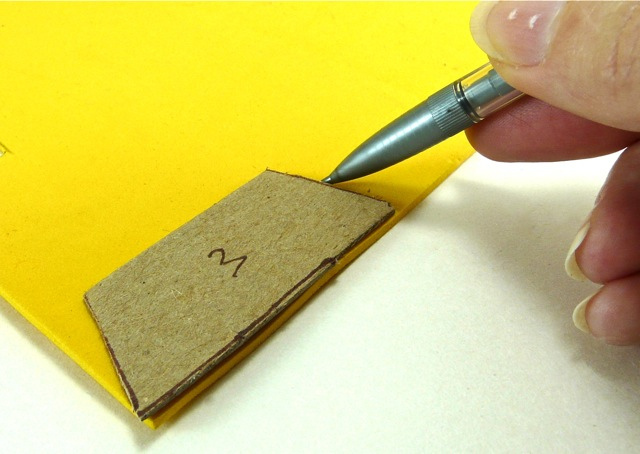
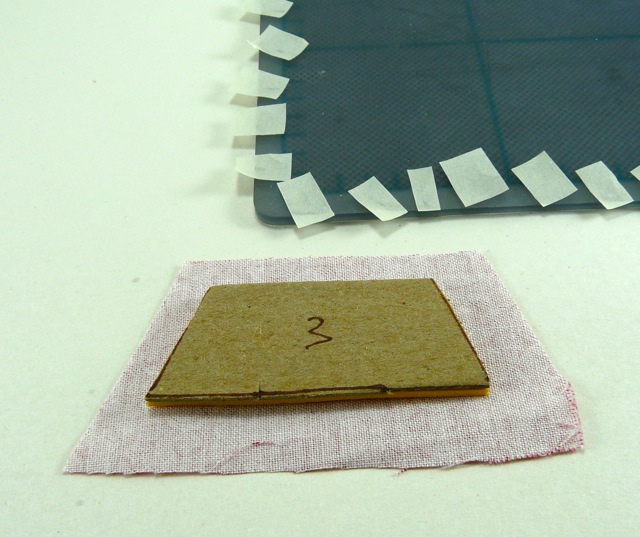
Cut one of the two shapes into sections along those dividing lines. Leave the other intact. And then, number the sections identically on each shape, as you see here. This will help you keep everything in the right order later on.
That may seem like a silly idea with this tree shape - after all, it's pretty clear which part is which. But with a shape where all the pieces are nearly identical, this numbering scheme makes a huge difference.)
OK, now to "upholster" each of these pieces. Start with the cut-apart sections. Trace one onto a sheet of craft foam. (You can get this stuff in the kids' section of most craft stores. One sheet will make a lot of ornaments.)
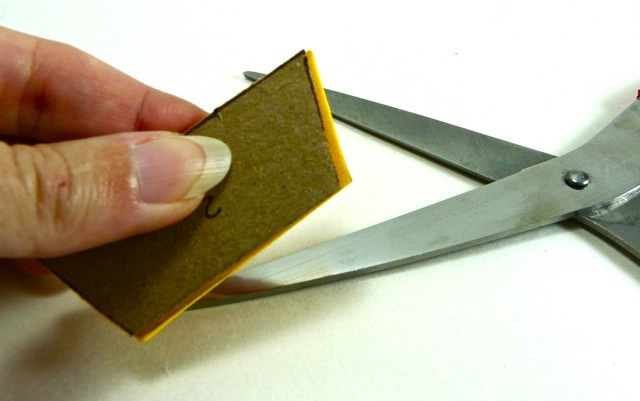
It's important that the craft foam be exactly the same size as the cardboard. So stack the two together, and if your foam sticks out at the edges anywhere, like it's doing here, trim away the excess.
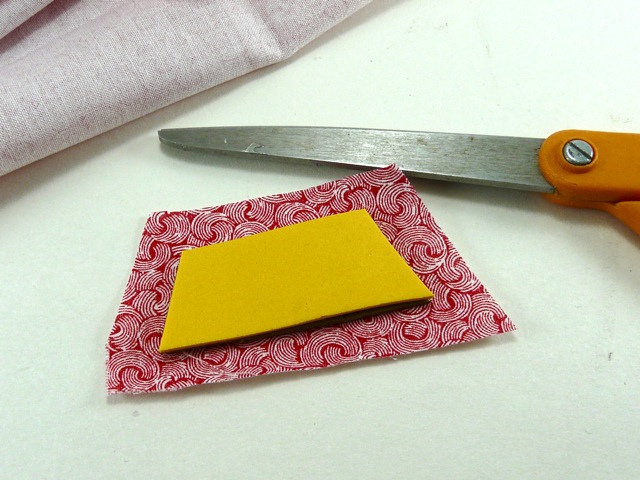
Now it's time for fabric. Cut a piece that's about 1/2" larger on all sides than the cardboard/foam pieces. You don't have to be super-precise about it, as long as there's roughly 1/2" on all sides.
You'll need some masking tape for the next step. (Good old masking tape!) Cut yourself a whole bunch of little pieces, and spread them out where you can grab them easily. I usually take about a 3" strip off my roll, cut it in half lengthwise, and then snip each half into a bunch of smaller tabs. You'll need some larger and some smaller, like you see here.
Also, place your fabric piece face down. Center the craft foam over that, and center the cardboard over the craft foam.
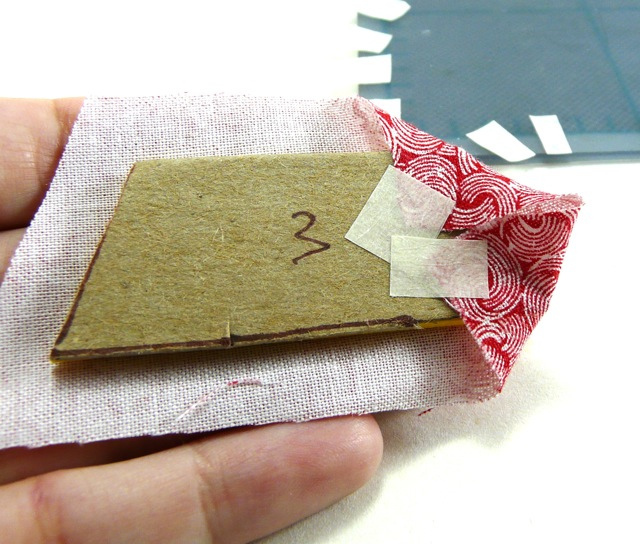
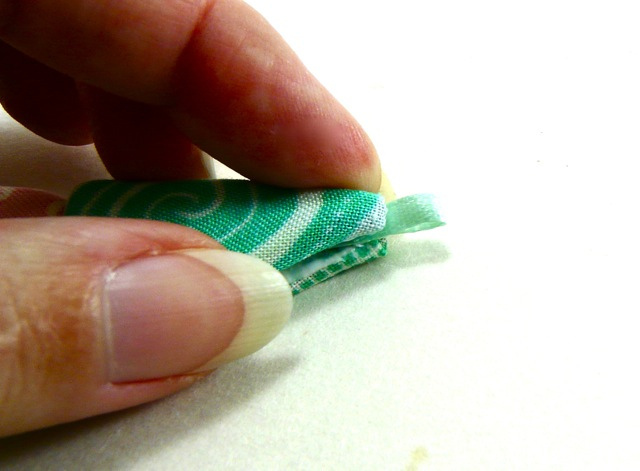
Begin the "upholstery" process at the corners. Gently stretch the fabric over one corner of the cardboard - be careful not to pull the fabric so tight that you bend the cardboard. Tape the fabric to the cardboard with the masking tape, burnishing it down firmly with your fingers.
I like to pull all the corners to the back first and tape them down. That gives you nice, smooth fabric coverage.
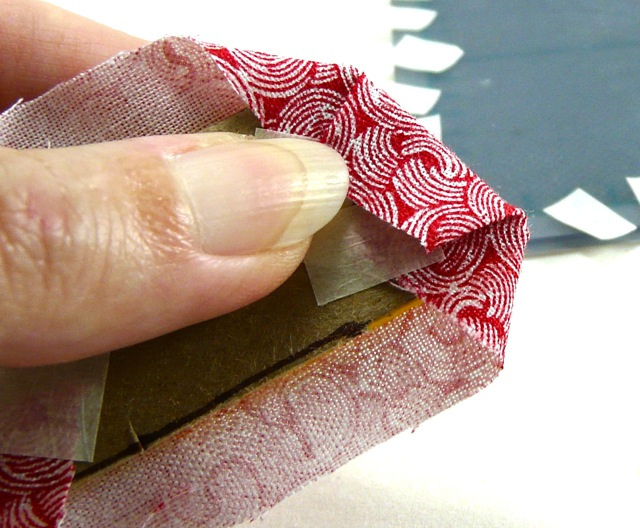
With the corners down, then pull the fabric around the sides of the shape and tape it down wherever needed. Some shapes need a lot of tape, and some don't. Just make sure that you're getting the fabric pulled nice and smooth over the front of the shape.
When you're done, you should have something that looks like this. Be careful not to let the tape wrap up over the sides of the shape - you'll want all the tape hidden.

Just a quick note: some shapes will have sharper corners, like this one. Occasionally, you may need to trim away a little excess fabric in order to tape it down smoothly. And, if you're taping in tight spaces like this, keep plenty of smaller tabs of tape on hand.
Repeat this process to "upholster" the remaining pieces. (I have no idea why I feel so compelled to put that word in quotation marks.) As you work, keep these pieces laid out in their numeric order, so you know which ones go where.
Next, cut another piece of fabric that's 1/2" larger than the intact piece on all sides, as you see here. You'll follow the same process to stretch and tape this fabric around the cardboard. Wherever you have an inward-facing corner, like you see at the tree trunk above, clip into the fabric a little.
(Just to clarify a point: this backing piece doesn't have any foam padding. You're just covering the cardboard with fabric.)
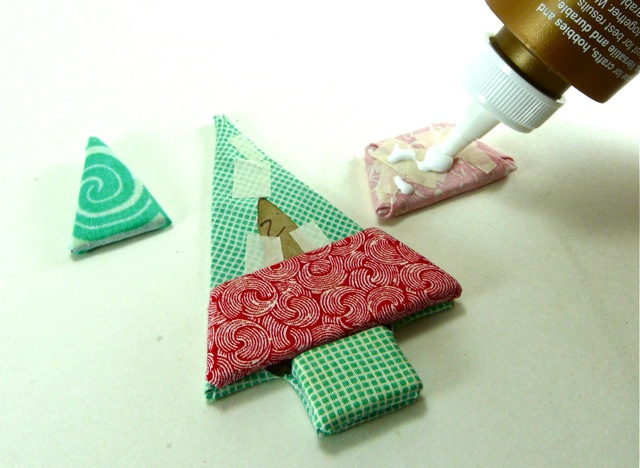
With your fronts and back all covered, it's time to assemble the ornament. Place the back piece with its fabric side down. Then, put some tacky glue on the back of each "upholstered" piece, and then place it on its correct section of the back piece.
When you glue the topmost piece down, slip in a little folded piece of 1/4" wide ribbon. That acts as a hanger. (Or, if you have no ribbon, use some yarn or a bent piece of wire.)

When you have the whole thing assembled, it's time to put it under a stack of heavy books to dry. (The pressure will make all the pieces lie nice and flat.) If you have a little glue oozing out at the sides, like you see here. wipe it away with your fingers before you put any books over it.
Leave your ornament under those books for a few hours or overnight. And you're done!
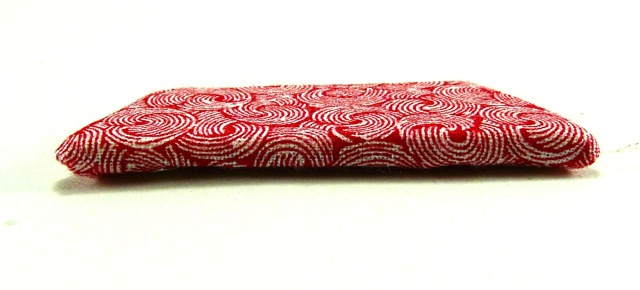
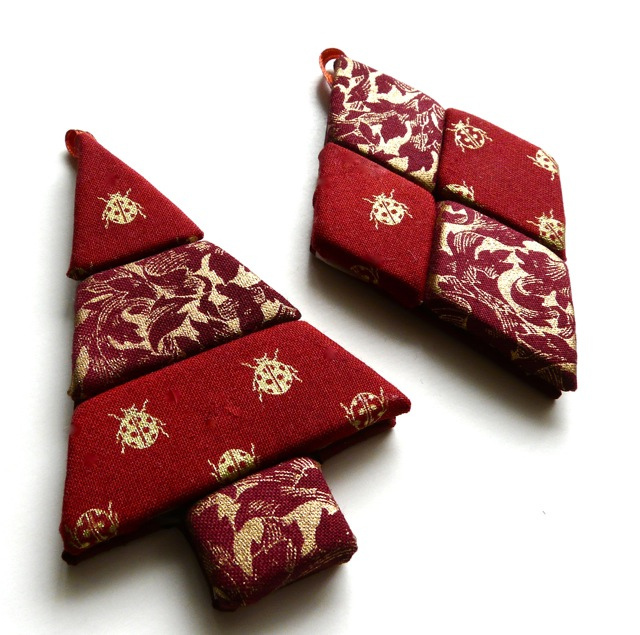
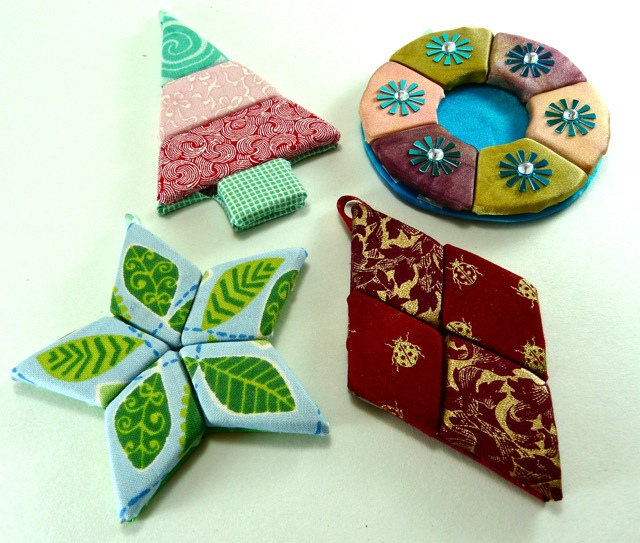
There are so many cool ways to interpret this project. I love using fabrics with metallic accents, because they look a lot like Japanese washi paper.
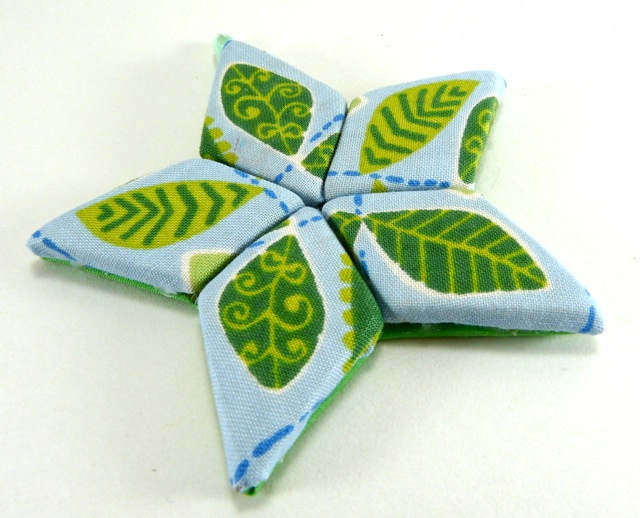
Here's one where I "fussy-cut" my fabric to take better advantage of the leaf design.
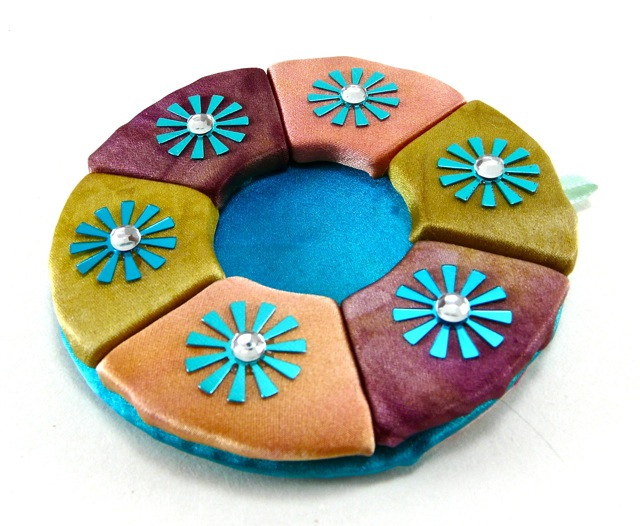
…And here's one covered with some beautiful dyed silk Pat sent me. It has such a pretty luster to it.
(Incidentally, the wreath is probably the most challenging shape of the four I designed, due to all the curved edges. I'd recommend making one of the other shapes first. Also, if you make a wreath, I recommend not cutting two identical cardboard shapes at first. Instead, cut one out, cut it into sections and "upholster" it, and then re-assemble them. Trace around this re-assembled wreath to get your backing piece.)
If you make one of these, I'd love to see! Will you post a photo to the CraftyPod Reader Projects Flickr Group?

![[Valid RSS]](../sites/files_cp7/valid-rss.png "Validate my RSS feed")
Comments
And I thought these were fabulous when I saw the prototypes! WOW! These are beautiful. I just hope I will find a prototype or one of these in a Christmas box with my name on it because I am not going to have time to make these AND finish your Christmas socks!
Now I really like these - to be truthful I wasn't that inspired by the gingerbread house just not my thing - but these upholstered ornaments are just lovely! And really unique, I haven't seen anything like this before.....now I must at least try and make one!!
Ooh - ooh - a dove shape would be TOTALLY COOL in this technique, and not too hard to do. I'm going to email you some felt bird links right now - as we all need more distraction this time of year. :-)
I have been looking for a good Christmas dove ornament idea. Using this technique might be fabulous!!!♡
They're so sweet Diane. and I've decided I'm going to make time definitely!! ;)
Thanks for the set of templates too. So love your red one with the gold accents. x
Thank you, Pam! I'll bet you come up with some truly gorgeous ones - and I want to see photos!
Oh dang! Using craft foam to upholster? Brilliant!
Really, how do you come up with this stuff? I'm so going to Bogart this for Dove ornaments. Problem solved!
Thank you! I love that idea of stocking stuffers!
I hear ya on the time crunch thing! I'd love to see how yours turn out next year!
Ooooh, I'd love to see how the kimono scraps look in this project! I hope you'll share some pics!
HAHAHAHA! I am giggling at how everyone who's commented here is saying, "I'm too busy to make these now, but..." So, you are not alone! :-)
Oh my gawd. Seriously? Dianne, how do you create tutorials that make me want to sneak out of work, head straight home and make them? These are awesome - thank you!
And, I will be giving these a try with some silk kimono scraps I've been hanging on to - as soon as the home bell rings!
This is brilliant! If I wasn't neck deep in Christmas Cards I think I'd clear my schedule and make these all day long :-)
Lovely fabric choices as well.
Thank you for this great idea! I don't think I'll make one of these this year as I'm still finishing some presents I'll be sending through the mail and now I don't have enough time! But I already started an idea book for next year and this will go in it. :)
Like I said before, Love. Also, your tuts amaze me. I have a couple in my head I need to do and just get over the intimidation. I think I'll try this with felt in the middle, as craft foam is one of the few supplies I don't have. ;)
Like I said before, Love. Also, your tuts amaze me. I have a couple in my head I need to do and just get over the intimidation. I think I'll try this with felt in the middle, as craft foam is one of the few supplies I don't have. ;)
Thank you so much! (But, do not be intimidated.) :-) I think felt would work just fine. In the Zakka Life tutorial, she used pieces of a still-flat pop-up sponge, which is pretty genius.
Still-flat pop-up sponge?
Intimidation was shrinking til I popped over to Twitter and saw you'd done 3 today...sheesh. ;)
When you see them, it'll make more sense. There's a theme at work, and next week is all tutorials on that theme. None of them is particularly challenging!
Thank you so much! (But, do not be intimidated.) :-) I think felt would work just fine. In the Zakka Life tutorial, she used pieces of a still-flat pop-up sponge, which is pretty genius.
I could 'faint' from the wonderfulness of these.
These are beautiful Diane! Thank you for putting the time into the tutorial! Tweeting... :)
I love these! Might even have time to make one or more before Christmas.
Yay! I hope you do, and I hope you have fun making them. Send me pictures, please!!
So cute!
very nice :D love the star, so many colour combos that could be used for that :)
Thank you! I have some tie-dyed fabric in stash that I think I might try next in the star shape. I think you could arrange the colors so they appear to radiate out. Oooooooh. :-)
Oh! This is so cute, is super nice, love it thanks for sharing it, Sister Diane.
Hugs
Thank you so much, Alexandra! And hugs right back!
Hi Sister Diane,
I wanted to let you know I did the ornament with my monthly craft class. They loved it and everyone came out with a beautiful ornament. This class had four guys in it too.
We were also ambitious and made magazine Cristmas trees with glitter on the edge. I wanted to top it with a quilled star but that part didn't happen.
Thanks for your creativity,
Juliet
This has to be the best crafty Christmas tree I've seen this year. Thanks for sharing !
These are wonderful, Sister Diane! So simple, sophisticated, so Japanese! And thank you for the templates, you're always so generous. Happy holidays!
xx Katie.
Thank you so much, Katie! I'm so glad you like these. Happy Holidays to you, too!
Really really nice. I have a few men's ties that resemble brocade that I have been saving for the right project--this is it. Thank you so much for the tutorial. A question, on the same format, could this be done for hotmats using insulbrite? thanks again, joanie
Interesting question, Joanie- I'm not actually familiar with insulbrite. What is it?
Sister Diane, I'm not really a sewer, just a beginner. I do know about insulbrite, it's insulated batting that you would use for potholders, hotpads and such. joanie
Ah, I see. Well, I suspect that it would work similarly to the craft foam, but the one thing the craft foam does well is hold that crisp shape and height. Maybe you'd want a couple layers of the insulbright to create a similar effect. If you try it, let me know how it goes!
With almost 2 months till Christmas, I better find the time to make these! Great idea!
I'm getting ready for my "O Tannenbaum" theme for Christmas and these are perfect. I'm going to make them today! Thanks for the terrific idea.
Wow, that a lovely tradition, Gretchen, and what a fun activity for Thanksgiving! If you take any pictures, I'd love to see!
I was desparately looking for an ornament that was "gift worthy" for a Girls Ministry Christmas Tea coming up. These are fabulous! I can't wait to get started. I only need twelve, but may make more for small tokens for friends & co-workers. Thank you so much.
Every Thanksgiving I go to my in-laws house with an ornament craft idea. It gives the kids (cousins) something to do, and the "project" has become a tradition. What a wonderful ornament idea! I can't wait to start getting the materials assembled - we're going to make the tree :) When it's time for my boys to leave the nest, I plan to box up all the ornaments they have made over the years for their own Christmas trees!
hi there! i always make my own ornaments for my christmas decoration and for giving as presents to some special friends, but i have never seen anything like this! i will try it, and let you know if i did it as good as you did! thanks a lot and hope you have a happy Christmas!!!
A new year and a new list of ornaments to make! This is going to be #1 Thankyou for a wonderful idea! (~.~) Ellen
OhWOW! What a great ornament and now I'm really sad as while having a good clear out, decided I was not likely to be making anymore fabric items so gave all my remaining fabric away. BooHooHoo.
Never mind, will have to start looking in the sales ready for next year.
Thanks for such a great tutorial and so many ideas, you are fantastic.
Thanks, Veronica! Heh! I guess we could say that my Christmas gift to you is an ironclad excuse to acquire more fabric! :-)
Could not find downloads. Help !!
All fixed, Pat - many thanks for the heads-up!
Could not connect to the page with the templates. Any suggestions?
I totally love these, and hope to make the wreath one with a photo in the center of one of our club sisters who passed away suddenly. It will make a wonderful keepsake.
All fixed, Judy - many thanks for the heads-up. Your project idea sounds lovely!
Pages