Blogs


After the Edit

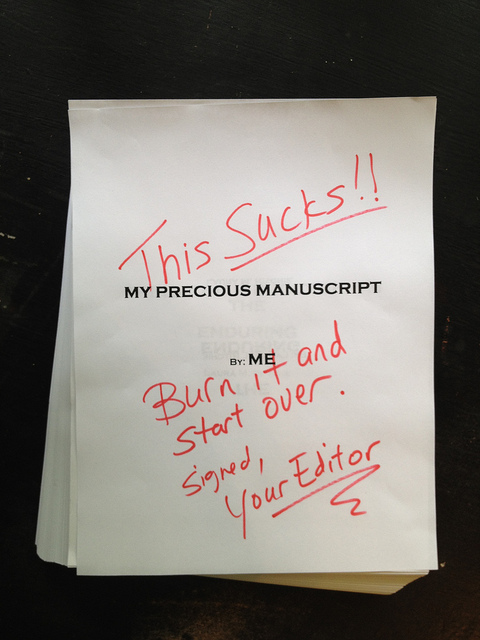
Image by Laura Ritchie, via Flickr. I thought it was hilarious, but should say, I've never had an editing experience remotely like this one.


In the past couple weeks, I've been in the editing phase of my forthcoming book. (Spring 2015!) And this is a phase of the book-authoring process I don't think I've seen anyone write about. Probably because it's not all that glamorous! But I do like to lift the curtain on the whole process for those who dream of book-writing, so I'll share a bit of what it's like.


The editing phase is the first moment in a book project where you start making a big transition, from the solitary hours you spent making and writing your book into a new collaborative space with many other professionals. It can be a little unnerving the first time, especially if you're used to blogging or tutorial/pattern writing, where you get to make all the decisions.


tsny los angeles

Image by Laura Bittner, via Flickr


…Not that you'd want to make all the decisions involved in producing a book by yourself! Making a craft instruction book requires a staggering number of them. I mean, you've made what feels like one million creative decisions designing the projects, and another million linguistic and grammatical ones as you write the text. But that's just the beginning. Your editorial team has editorial decisions to make about how your work will be structured and presented overall. Then there are spelling, punctuation, and clarity decisions to make as the copyeditor goes to work.

Your photographer, stylist, and/or illustrator have all kinds of decisions to make related to making your work look great and communicate well. The designers have decisions to make about how your work will be expressed visually in terms of typefaces, colors, page layout, and illustration. And later, they'll wrestle with decisions about making everything fit on pages in a logical order.

Book-making is truly a team sport, and here you are in the lineup.


Sandbox


It's a tricky space to be in, because on the one hand, you're very fortunate to have all these professionals working with you and making your book better. And on the other hand, you've put so much love and work into your book, it's hard sometimes to let other people play in your sandbox. That's a perfectly human reaction, and I end up having it with every book, even as I deeply appreciate my whole editorial team.

The important thing to remember is, your publisher is making a significant financial investment in you. (How much does it cost to professionally edit, design, print, and distribute a book, let alone pay you an advance? A whole lot.) Your publisher, then, has every right for this book to represent them as well you. And that means working within their grammatical standards and presentation style. Hopefully, before you chose a publisher, you made sure their style worked with yours. And hopefully they did the same in choosing you.

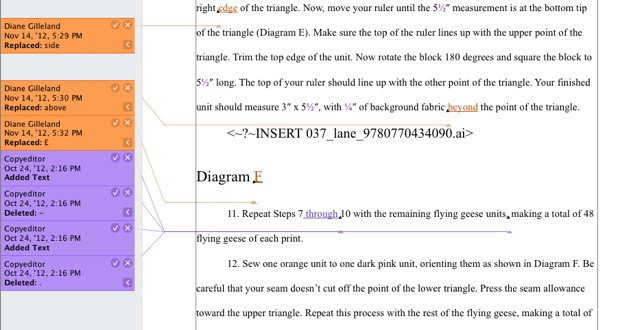
Track changes look like this. Everyone who changes the text shows up as a different color in the margin, and every little change shows up in its own time-stamped notation.


Your view of your book during this editing phase of the process isn't particularly beautiful – orderliness is way more important at this stage. Your publisher will send you a copy of your manuscript that has been combed through by one or more editors – depending on the book, this might include a development editor, a technical editor, and a copy editor. (Some publishers will have several editors look it over before you see it, and others will send it through one editor, then to you, then another editor, then back to you, and so on.)

You communicate with these editors via something called "track changes" or "track comments," which are automated notations that live in your manuscript. When you or an editor type something new in your MS, an automatic note appears in the track changes column. And you can also insert comments that point to specific blocks of text. Your editors will use these to ask you questions or point out things they think aren't clear enough, and it's your job to answer or address them all.

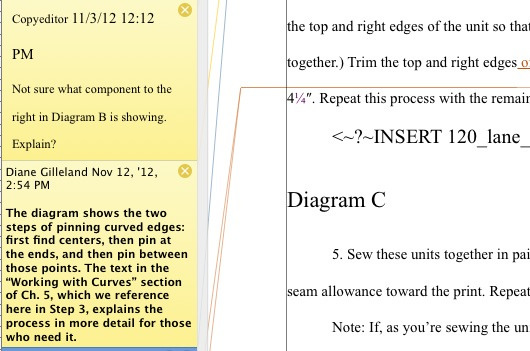
A sample track comment, and my response.


Sometimes your MS will contain tons of track comments, sometimes only a few. The number isn't any reflection on how knowledgeable or talented you are – although it's easy to forget that sometimes, and assume that every comment means that you suck in some fresh way. But nobody involved is trying to break you down; they're trying to make your book better.

That said, track comments can sound a bit terse. They aren't the place for humorous asides or rambling – they need to be short and to the point. Which, I won't lie, makes reading them sometimes feel a little like being scolded. But they're never meant that way, and you can't take them personally. Your book is now a business entity, and it's time to keep a business mindset. (Not that this is always easy when you've put so much of yourself into this book.)

I do find it helpful to be very, very kind to myself during the edit phase of a book – a little extra chocolate, a nice walk in the park, a fabric splurge. A little self-care helps keep you from getting too emotional.


A. Nachronism

Image by Andrew Becraft, via Flickr


Usually, you'll find that you agree with many of the track changes your editors have made. (And more than once, your editors will totally save your patootie by catching a big error somewhere in your text.) But invariably, you'll run across a few changes you don't agree with. And here's where it's time to take a step back and "choose your battles wisely." Not that you're battling here! But you are deciding what is and is not worth arguing over.

As I said before, your publisher has a right to have this book represent their style and standards – and sometimes this means they'll want things said differently than you'd say them. I think this is particularly true when you're an author who's primarily a blogger, because in blogging, it's okay to write in a conversational style, using grammar and punctuation creatively to express mood and meaning. That kind of thing has to be balanced with professional style standards. (Although personally, I think few things can suck the life out of a sentence more efficiently than rigidly correct grammar.)


Sharing Flavored, Colored Ice

Image by clappstar, via Flickr


Anyway. When I come across changes my editors have made that I disagree with, I have to stop and assess how strongly I actually feel about it. Even now, in the fourth book project I've worked on, my knee-jerk reaction to these things is often "Stop Killing My Baby!!" Which is irrational and unprofessional. So I take a breath and ask myself: am I merely irritated that I can't use a semicolon in my own special way? Or do I truly feel like the edit is fundamentally compromising my meaning?

I also find it helpful to keep a separate running list of the edits I disagree with. Then, when I'm all done editing the manuscript, I can go back over that list and see if I'm feeling differently about any of them. (Sometimes fatigue or low blood sugar create annoyance that magically vanishes later.)

When I've narrowed down to a list of the changes I truly think are worth disputing, I then take my time crafting my notes back to my editor. Rather than saying "No way! You can't change that!", I try to explain why I think the change doesn't work. And I try to suggest one or more alternative solutions. That gives my editor and I a jumping off point to forge a good compromise.


Focus on the Point

Image by Steve, via Flickr


Incidentally, this edit phase is also a great opportunity to see your book with fresh eyes (since usually, several months elapse between turning in the MS and receiving an edited copy back.) If, as you're reading, you think something needs a revamp, this is the time to speak! Don't wait and see if someone else notices. This is the last time it's easy and inexpensive for the publisher to make changes to your book, so act on your impulses. Discuss any major changes you're considering with your editors – they're there to help.

(And in case it's useful, I always, always find at least one sentence in every manuscript that makes me facepalm and groan, "Gah! What was I thinking when I wrote that?!")


happy FUTAB, on a trellis

Image by tracy ducasse, via Flickr


Time is also a really important factor. I don't think too many of us can operate in our edit-brain for hours and hours at a time – editing is fatiguing. The trick is to cultivate enough freshness that your impressions of your work will be similar to those of an average reader. And when you're deeply, intricately bonded with the work, that's freaking tricky. I can only work on my edits for a couple hours at a time, and then I have to step away for quite a while and refresh.

If you're lucky (and I am right now), your publisher will give you a deadline with enough room in it to allow for these breaks. Though honestly, in my book-writing experience, this isn't always the case.


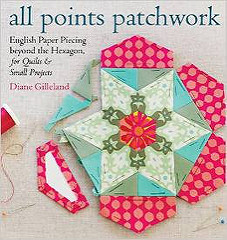
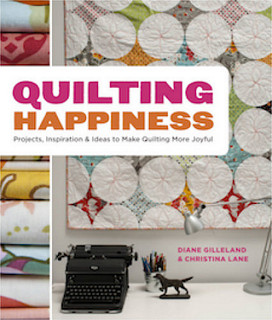
From here, your book moves on to the design and layout phase of the process. The next time you see it, it'll be pretty! (I'm so excited to see how mine turns out, I can hardly stand it.)

Categories: 


Here's a new video in my PC Basics series, covering how to build a simple box from start to finish. You can use this method to make any size square or rectangle box, with any kind of stitching on it you like.

I also threw in some tips for managing yarn tangles, ending yarn strands, and getting better coverage at corner points.

The whole series is over on the YouTubes.

instavase-finished3-wm


This is one of those projects that had many points of genesis. First, I've been decluttering lately and got rid of all my assorted vases. Then someone gave me flowers, and I was all, "Oh crap, I have nothing nice to put these in." And then, given that I'm making quilts like crazy these days, I've been wishing for a really quick EPP project to relax with. And then, I was washing out an empty peanut butter jar for the recycle bin one day, and all these little data points came together in my head with a bang. Result: The Instavase!

You'll Need:

  • • A clean, fairly large jar from your recycle bin – glass or plastic
  • • Several pretty quilting cotton scraps
  • • Two large scraps of linen, or quilting cotton, or both
  • • One scrap of batting
  • • Diamond English paper piecing templates (see below)
  • • Hand-sewing needle
  • • Thread that coordinates with your fabrics
  • • About 5" of elastic cord
  • • Removable fabric marking pen
  • • Two 1" sew-through buttons


EPP Instavase Tutorial


First, we need to get the dimensions of your Instavase wrap. Measure the circumference of your empty jar. Then add another 2" to cover seam allowances and overlap. (So I'm using a fairly standard peanut butter jar here, which is 11" around. Adding another 2", I get 13" in length.)

How tall does your wrap need to be? Again, measure your jar. You're looking for a height that covers most of it. Then add another 1/2" to cover seam allowances. (My jar needs 3 3/4" in height to cover. Adding the extra 1/2", I get 4 1/4".)


EPP Instavase Tutorial


Cut two pieces of fabric to these dimensions. I'm using one piece of linen and one of quilting cotton, but you can make them both the same. Also, cut a piece of batting that's 1/4" smaller on all sides. (Instead of doing math, I just cut the batting to the same size as the fabric and then lop off the extra 1/4" from each edge. Because I'm lazy like that.)


EPP Instavase Tutorial


Now, make some EPP! I'm using a 1 3/4", 60-degree diamond template here. You can print my free PDF template and cut them out, or buy readymade templates online.


EPP Instavase Tutorial


The number of diamonds you'll need depends on your jar. For my peanut butter jar, I needed 11. Just lay your paper diamond templates out on top of your cut fabric and see how many of them fit. Remember to leave space at the edges for a 1/4" seam allowance. My diamonds come right to the edges of that size. If you want less of a tight tolerance in your seams, you can reduce the size of the diamond templates a little.

This video explains how to baste the templates. I'm basting through the fabric only here – the first method shown in that video. This video explains how to sew the patches together.


EPP Instavase Tutorial


For diamonds arranged horizontally like this, I like to sew two long zig-zag seams: one that attaches the top row to the middle one, and one that attaches the bottom row.

I opted to arrange my fabrics fairly scrappily here, but feel free to come up with a more formal arrangement of colors if you like.


EPP Instavase Tutorial


Now you have a pretty applique unit, full of nicely-matching points. While the paper templates are still in there, give the whole thing a good pressing with a hot steam iron. Aim to flatten out all the patches.


EPP Instavase Tutorial


Then, take a look at those points of seam allowance that stick out from the edges. We need to hide those puppies, so fold them to the back of the work and press them well.

Do the same thing at the ends of the strip – fold the flags at the tips over so they're hidden. (If you see any fabric sticking out at the edges of these points after pressing, you carefully can trim it away.)

Now that everything's neat and pretty, you can take out the paper templates. This video explains how. Then press the strip one more time once all the templates are out.


EPP Instavase Tutorial


Now we'll applique and do a little quilting. So pin the batting to the wrong side of the fabric you're using for the front of the wrap, centering it there. Then pin the applique unit you've made to the right side, centering that as well. Use plenty of pins so it won't move around as you're sewing.

Incidentally, these little shorty applique pins are dandy - they let you pin all over without needing to move the pins around during sewing.


EPP Instavase Tutorial


Machine stitch 1/8" away from all edges of the applique strip. Then, make some additional quilting stitches as you like. I decided to follow the shapes of the diamonds, but you can really do anything you like – including not quilting it at all!


EPP Instavase Tutorial


Now let's make an elastic loop closure. Cut two 2 1/4" lengths of elastic cord. At the right side of your finished top, measure 1" in from the top and bottom edges and make a mark with a removable marking pen.

Bend one piece of elastic cord at its center, pressing the fold with your fingers to help the cord hold it better. Place the folded cord on top of the first mark you made, lining up the raw edges of cord and fabric. Baste over the cord with about a 1/8" seam allowance, reversing your stitching once to make it more secure. Repeat this process with the other piece of cord, basting it over the second mark you made.


EPP Instavase Tutorial


Pin the finished top to the backing fabric now, right sides facing. Sew around all four edges with a 1/4" seam allowance, leaving about a 3" gap near the center of the bottom edge. Your seam will catch those elastic cord loops.

Clip the four corners and turn the whole thing right side out. Poke a bodkin or chopstick into the corners to make them nice and sharp. Then press the whole thing flat. The elastic loops should now be sticking out from one side.


EPP Instavase Tutorial


If you like, stitch 1/8" from all four sides – that will finish the edge nicely and close the opening. Or if you'd rather not, then just close the opening with a ladder stitch. (Wendi Gratz has a great tutorial for that.)


EPP Instavase Tutorial


Wrap the Instavase around your jar now, overlapping the looped edge on top. Use a removable fabric marker to make a dot inside each of the loops. These marks are where you'll sew on the buttons.

Sew two buttons to the non-looped edge of the Instavase, right over each of your marks.

EPP Instavase Tutorial


Aaaaand you're done! Go get some flowers!


I know I've been quiet this week - I'm in deep quilt-making mode at the moment, but will have a couple new things to share soon. Meantime, here's a new video in my EPP Basics series. It covers two good ways to take the paper templates out of an EPP project. Enjoy!


I've been adding new videos to my YouTube channel week by week, and trying to remember to share them here as well. So here's the latest, a little how-to for sewing two panels of PC together.

If you're of the YouTube persuasion and want to subscribe to my channel, you can do so over here. New vids every Friday! (Generally speaking.) :-)

Happy Hexie Pins Tutorial

Happy Hexie Pins Tutorial


I made a whole bunch of these pins to take to Craftcation, and they were a surprisingly big hit, so I thought I'd share a how-to. They're super fun to make, and an excellent use for little scraps.


You'll need:

  • Stiffened felt in white or a light color (available at many big box craft stores, or online)
  • • Cardstock
  • • Fabric scraps
  • • Craft glue
  • • Sewing machine and coordinating thread
  • • Hand-sewing needle
  • • Felt
  • • 1" pin back


Happy Hexie Pins Tutorial


So, Sizzix was kind enough to sponsor not only Craftcation, but the EPP class I taught there. They sent me one of their Fabi cutters ahead of time to play around with. This machine was the inspiration for these pins – I realized that I could quickly cut multiples of perfect hexagons, so making pins by the dozen would be easy.


Happy Hexie Pins Tutorial


I used the 1" and 3/4" hexagon dies for this project, but really you could use any size you like. For the two styles of pin I made, I did these diecuts:

  • • With the 1" die, I cut some stiffened felt, some regular felt (not pictured, sorry) and some card stock.
  • • With the 3/4" die, I just cut the stiffened felt.


(If you're unfamiliar with the Sizzix and want to see this in action, watch this video.)

With everything cut out, you can set the cardstock and regular felt hexies aside until later. The stiffened felt hexies, we need to cover with fabric.


Happy Hexie Pins Tutorial


I used my go-to method of EPP fabric cutting and basting for this project. (It's the first method I share in this video.) You just need to end up with fabric smoothly covering the stiffened felt, and no basting stitches visible on the front.

  • • For the two-hexie style pin, you'll need to baste one 1" hexie and one 3/4" hexie.
  • • For the three-hexie style pin, you'll need to baste three 3/4" hexies.


In case you're wondering, of course you can cut your fabric hexies for this project with the Sizzix! I chose to cut mine by hand here because I'm a total fussbudget about using directional fabrics and lining the designs up on my hexies. But you could use these Sizzix dies for fabrics:

  • • A 1 1/2" hexie die would cut fabrics for your 3/4" stiffened felt.
  • • A 1 3/4" hexie die would cut fabrics for your 1" stiffened felt.


(I recommend having about 3/8" or more of fabric sticking out from all sides of your stiff felt hexies before you baste - that makes it much easier to baste without stitching through the stiffened felt. If that last sentence made no sense, just watch the video.)


Happy Hexie Pins Tutorial


So, for each two-hexie pin, you should have one large and one small fabric-covered hexie. For the three-hexie pin, you should have three small fabric-covered hexies.

These pins get their sturdiness partly from glue and partly from machine-stitching. The first step is to glue the hexies together. For the two-hexie pin, just glue the smaller hexie on top of the larger one, centering them to each other. You can see above that I'm not using a ton of glue here. You want to anchor the pieces together, but not create a thick layer of hardened glue that your sewing machine will have to struggle through later.


Happy Hexie Pins Tutorial


For the three-hexie pin, arrange your hexies in a configuration you like and use a similarly small amount of glue to anchor them together. I like to keep some scraps of my stiffened felt on hand to help keep the hexies level as they dry. Just slide it under any section of the pin that's showing a tendency to sag while the glue's wet.

Let the glued hexies dry for several hours, or even overnight – you want them to be firmly in place before you sew on them.


Happy Hexie Pins Tutorial


It's also important to glue an extra bit of stiff felt to the back of the three-hexie pin, so it has a consistent thickness throughout.

Here's what I usually do: I take a scrap of the stiffened felt, and trim a corner so it will nest reasonably well into the space at the back of the pin. Then I glue it down, letting the glue dry for 20 minutes or so. And then, I trim the rest of the felt flush with the edges of the pin. (As you can see, it doesn't need to be any particular shape as long as it fills in the gap on the back.) Leave this to dry another several hours.


Happy Hexie Pins Tutorial


Now that the glue is dry, it's time to pop your pin on your sewing machine. Stitching through all the layers will really firm up your pins and make them very sturdy.

For a two-hexie pin, stitch about 1/8" from the edges of the topmost hexie. Choose a thread color that complements your fabrics, and put any old color on the bobbin - it won't show. I prefer to use a walking presser foot here for best results. Start stitching at the center of one side, and don't reverse stitch at the start or end of your seam. Instead, sew your way around until you reach your starting point, and then stitch a couple stitches over. Then cut the thread with some tails.


Happy Hexie Pins Tutorial


Thread the tails on a hand-sewing needle one at a time, and pull them to the back. Tie the thread ends in a double knot and cut them close to the pin. This method creates a nice finish to the topstitching.

For a three-hexie pin, stitch about 1/8" from all three hexies, starting with the center one. Since you're stitching on three separate hexies here, you'll of course end up with more thread tails to pull to the back.

(And incidentally, you could totally stitch around these edges by hand with a tiny running stitch, if that's your sort of thing.)


Happy Hexie Pins Tutorial


Finally, it's time to add a pin back and backing, and it's time for the hexies you diecut from cardstock and regular felt to see some action.

For a two-hexie pin, trim a little from the edges of the cardstock hexie - you want it to be a tiny bit smaller than the pin, so it won't show at the edges. Glue the cardstock to the back of the pin, centering it. Then, glue the regular felt hexie on top of that. Try to get the glue near the edges of the pin here, so the felt is well sealed.

Lastly, glue on a pin back, and if you like, a little scrap of felt to cover it.


Happy Hexie Pins Tutorial


If you're making a three-hexie pin, then you'll need to trace your finished pin onto cardstock and regular felt. Cut the cardstock a little inside your traced lines so it comes out a bit smaller than the pin. Cut the felt out to match the pin. Then glue it all together as above.


Happy Hexie Pins Tutorial


And that's it! Happy pin-making!

halfhexbutt-finished-wm1

It's probably no secret by now that I loves me some EPP. It's a technique I use every time I want to make a patchwork design that would be a bit of a pain in the patootie for me to execute by machine. (As in: anything with Y-seams.)

So for this project, I used good old hexies to make the patchwork strips, and then machine-sewed those to larger pieces of fabric. It's a very forgiving project, and gives you both EPP enjoyment and quick gratification.

You'll Need:

  • • 5 fabric scraps (for butterflies)
  • •About 1/3 yard of background fabric (linen, solid or small-print cotton - you decide)
  • •1/2 yard of backing fabric (again, linen or cotton)
  • •20" square piece of low-loft cotton batting
  • •Thread that coordinates with your fabrics
  • •Hand-sewing needle (a sharp or between in a length you like)
  • •Hexie EPP templates (see below)
  • •Paper scissors and fabric scissors
  • •Seam ripper
  • •Six-strand embroidery floss
  • •An 18" square pillow form


butterfly-hexies

This project uses hexies with 1 3/4" sides. You can download and print this pattern and cut out 27 hexie templates for this project. Or, if you'd rather not do all that cutting, you can order up a pack of lovely pre-cut templates from Paper Pieces.


This video shows you how to cut the fabric and baste your hexies. You'll need to baste:

  • •9 hexies in your background fabric
  • •18 hexies in butterfly fabrics (two hexies per butterfly, nine butterflies total)


I recommend basting only through the fabric, not the paper templates, for this project. (It's the first method shown in the video.)

I made two butterflies each of four of my fabrics, and one butterfly of the fifth one. But you can really do anything you like here - make them all in just two fabrics, or make each one a different fabric.

halfhexbutt-epp-diagram

Now, whipstitch those hexies into two strips, arranging them as you see here. Use your butterfly fabrics for the sections where the strip is two hexies wide. Make sure you're scattering your various fabrics along the two strips as you like. I always find it helpful to lay my hexies out before I sew, so I know what goes next to what.

(If you need help with the whipstitching part, try this video.)

halfhexbutterfly-readytocut

Press your completed strips with a hot iron. I recommend no steam for this pressing. Here's why: a lot of times, when you work with hexies, you end up lining the grain of the fabric every which way. This isn't a big deal for EPP generally, but when you're working with thin strips like these, steam can accidentally help stretch the fabric this way and that as you press, and that will mean your strips don't end up being straight. So: no steam, and always press your iron straight down; don't slide it around. Then you'll be just fine.

When you've pressed the strips, you can take out the paper templates. Just reach in at the edge of each patch until you can grab the edge of the paper. Then peel it out. Save those templates for a future project!

…Aaaaaand then press your strips again once those templates are all out.

halfhexbutterfly-cutbasting

We need to trim the long edges of these strips straight now. The first step to that is to press the sides of those single-hexie sections out flat. So take a seam ripper and gently cut the two tack basting stitches at the corners closest to the edge. Pull out that bit of the basting thread. (You can leave the rest of the basting there - it's not hurting anything.)

halfhexbutterfly-pressedout

Then, open out the side edges of each background hexie and lightly press them flat. (Leave a bit of the original crease in there – it'll come in handy in a moment.)

Don't do anything at all, by the way, to the two-hexie sections of the strips.

composite-halfhexbutt-ruleralign

OK. Place one of your strips on your cutting mat now, and line your ruler up on top. Your alignment point here is a little tricky, so let's be very careful…

Do you see how the points of the hexies along the edge of the strip form an invisible line? Take that line, and line your ruler's 1/4" line up along it. (I put a big red dotted line on the image above to show you exactly where that is.)

>composite-halfhexbutt-happymed

…Now here's the thing about EPP. It's hand-sewn. Hand-sewn things sometimes have little variations. There's nothing in the world wrong with this.

As you're lining your ruler up, you'll likely notice that there are some little variations in how well these notch points line up on that 1/4" line. Some will be right on, some will be slightly off. It's okay. Get the best happy-medium alignment you can, and it'll all work out.

halfhexbutterfly-trimmedstrips

Trim both EPP strips in this manner, and then you're ready for the sewing machine.

halfhexbutt-piexing-diagram

Here are the pieces to cut from your background fabric - seam allowances are already added to these measurements (and a little squaring room).

Sew your EPP strips to these background strips in the order outlined above. Use 1/4" seam allowances. Press the seam allowances away from the EPP strips.

halfhexbutterfly-seamline

I recommend always sewing your seams on the EPP side - that allows you to make sure those little notch points in the patchwork are getting caught in your 1/4" seam. It also helps keep the EPP seam allowances from moving around.

halfhexbutterfly-drawn

halfhexbutt-embroidery

If you want to add bodies and antennae to your butterflies, you can use my template to trace from, or you can hand-draw your own. I like a FriXion pen for this step - its marks remove with the heat of an iron. I drew the outlines right on the pillow top, stitched over them, and then pressed to erase any bits of line still showing.

I used split stitch to fill in the bodies and back stitch with a french knot for the antennae. You can put the pillow top in an embroidery hoop, but be careful about stretching your seams out too much.

(Many thanks to Sublime Stitching for the excellent stitch how-to's I linked there. I'm also using their awesome floss here!)

butterfly-quilted

When your pillow top is all sewn and stitched, square it to 18". Then cut a piece of batting to the same size and a piece of muslin the same size.

Stack these three squares together: muslin, then batting, then pillow top. Take a needle and thread and make big basting stitches through all layers. I like to do three rows of basting horizontally and three more vertically. That holds everything together while you quilt.

I recommend using a walking presser foot for quilting. Inspired by Kevin's awesome book, I just did some loose vertical lines. But if you like to get fancy with the free-motion quilting, that would look awesome, too.

When the top is quilted, pull out the basting.

halfhexbutt-finished-wm3

I made an envelope back for my pillow. Here's a simple style tutorial over at The Happy Housie, and a slightly more complicated style at Lia Griffith.

…And that's it! Piece and enjoy, my friends.


Pages